Table of Contents
PMIP and video-conferencing
You may have to plan a video-conference with other PMIP members (your working group, etc…). This page should help you do that!
Unfortunately, several things can go wrong (with you webcam settings…), so you should experiment with the available tools and hope things work OK… 
Choosing a meeting time!
Once you have agreed on a meeting date, and before testing your webcam, the next thing to do is agree on a convenient enough meeting time! The following web site seems pretty good for finding an OK meeting time across several time zones (by specifying the meeting date and cities involved). Otherwise, you can always google some more
Using the RENATER Rendez-vous site
Note: RENATER is the internet network provider for French research institutes
Prerequisites
- At least one of the participants must have a CNRS password to create/initiate the conference
- Use the sesame/janus web site to get or change your password
- Each participant should have a computer or a smartphone
- Computer access: you need to have one of the following compatible browsers installed: chrome, chromium or Firefox
- A compatible browser is all you need! No need to install a video-conferencing application!
- The browser will (transparently) use a WebRTC extension to connect to the server, unless WebRTC is not available for your browser or operating system
- Just to be sure, you should open the following link to access the Rendez-vous test page and click on Lancer le test
 Check if the following is still true ⇒ The screen sharing plugin will only work in chrome…
- Participants wanting to use video and/or voice should have a working webcam and/or mike
- You can always share your screen even if you don't have a camera
- You can also use the chat window if you don't have a working mike (make sure other participants also open the chat window in that case)
- It is usually easy to find where to adjust the sound level of your speakers/headphones (you should have some global output sound mixer somewhere), but it may be harder to adjust the microphone input level. It's best if you know where these settings are before the conference
- Smartphone access: you need an Android phone or an iPhone with the Jitsi Meet app installed
Limitations
- Rendez-vous is not compatible with a Polycom equipment
- Max number of participants? Undocumented, but used to be 12 (as of September 2015)
- Is the following still a problem? Is this solved by using Jitsi Meet on IOS? ⇒ Does not seem to work on Ipad (missing codec for the browser). Regular Apple computers are OK
Usage
- One of the participants with a CNRS account has to create the conference by:
- visiting the https://rendez-vous.renater.fr/ site and typing a new conference name (or an old one that is not already in use) in the input field (e.g pmiptest)…
- if you are using Rendez-vous for the first time, you will have to identify yourself with your CNRS account: select CNRS in the “Pour accéder au service rendez-vous.renater.fr sélectionnez ou cherchez l'établissement auquel vous appartenez” pull-down menu and the use your CNRS identifier
- …or directly opening the URL with the conference name
e.g.https://rendez-vous.renater.fr/pmiptest - you can optionally add a password to the conference by clicking on the i icon at the bottom right of the screen and selection Add password
- it is a good idea to click on the Open / close chat icon at the bottom left of the conference window to open the chat window. This way, you will be able to communicate with (and help) other participants, even if they have problems with their webcam.
- Let the other participants know about the URL (and optional password) they should use to join the meeting. You can of course agree on a meeting name, URL and password before the meeting actually take place. If your conference name is specific enough, there is a good chance that nobody else will be using it when you need it
- The guests participants can join the conference by just opening the appropriate URL !!
e.g.https://rendez-vous.renater.fr/pmiptest- Click on the More actions icon at the bottom right, and select Settings, then type your name, and select your language
- It is a good idea to click on the Open / close chat icon at the bottom left of the conference window to open the chat window
- The first time you will click on the Share screen icon, Rendez-vous will ask if it can install the desktop streamer chrome extension
- Once you are connected, things are pretty straightforward. Just look at the few available icons on the conference page
If things go wrong
- If something is not working, first make sure that you are using the required browser!!
- If you have problems with your webcam (no image or no sound) but you are sure that your webcam is working (because the webcam is working correctly with other applications):
- make sure that no other application is using the webcam at the same time as Rendez-vous
- check the Flash settings (←- this URL has to be opened in chrome)
- Do not forget that, even if other participants can't see or hear you, you can still use the chat window to communicate with them
Using RENAvisio and SCOPIA
- Please mute your microphone when you are not talking, in order to reduce echo or background noise
- It's always safer to join a meeting before the official starting time to make sure the video and audio (microphone and speakers/headphones) are working, or use the test conference (room = 9999 - code = 0000), especially if you have never used the system, or if you have not used it recently and you may have to update the conference client
- if you are using a desktop/laptop (and not a Polycom or similar hardware installation), you can use the chat window located at the bottom left of the conference client
Prerequisites
- At least one of the participants must have a CNRS password to create/initiate the conference
- Use the sesame/janus web site to get or change your password
- You can use any browser to initiate or join the conference with the conference link, but this will start an external application for actually handling the conference
- Participants wanting to use video and/or voice should have a working webcam and/or mike
- The required external program will work on:
- Windows: your browser should automatically display the instructions for installing the application
- Mac: not tested
- Android: Avaya Scopia Mobile
- You have to specify
desktop.visio.renater.fras the server name, and then specify your meeting ID number and code
- Apple iPhone iOS: Avaya Scopia Mobile
- You have to specify
desktop.visio.renater.fras the server name, and then specify your meeting ID number and code
- Not Linux: there does not seem to be any Linux support (we have tried the sip and h323 protocol in Linphone and Ekiga with no success). See the hardware and phone options below
- You can also:
- use a video conferencing room
- tested hardware client list (in French)
- call the following number in France, and use the conference number and access password: +33 (0)4 26 68 73 07
Limitations
- 20 participants max (as of March 2017)
- RENAvisio+SCOPIA does not fully work on Linux. It may be possible to have sound only
Usage
The notes below apply to the recommended SCOPIA type of conference. If there are no more slots for SCOPIA, you will get the CODIAN system that we have not tested
Creating a meeting
One of the participants with a CNRS password has to create the conference by:
- visiting the https://renavisio.renater.fr site, using the CNRS password to log in, and then making a conference reservation or choosing to initiate an immediate conference (limited to 3 participants)
- make sure you select Send me a calendar event and select scopia in the Advanced settings
- You can get all the details in Support -> User guide (use the Language menu if you need to switch to English)
- Once the conference is created, you will get a mail with the conference details (how to connect…), in French and English, that you can send to the other participants. In most cases, you will have to follow a link looking like:
http://desktop.visio.renater.fr/scopia?ID=RRRR***CCCC&autojoinRRRR: your conference or room numberCCCC: your conference access code
Initializing or joining a meeting
- theoretically, you only have to click on the Connection from a single terminal link specified in the mail you received. The link already has your meeting number and password, and will guide you to install the required external program
- from a practical point of view, it is safer to follow the link to the test conference room (always active) below and install/test everything before the meeting
- Warning! If your conference has already started, make sure you follow the link to your conference, and not the test conference
- You can follow the detailed steps below, in case you are lost because some instructions are written in French
Detailed steps
The steps and screenshots below are for Windows, but you should have something similar enough on a Mac…
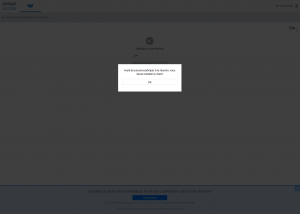
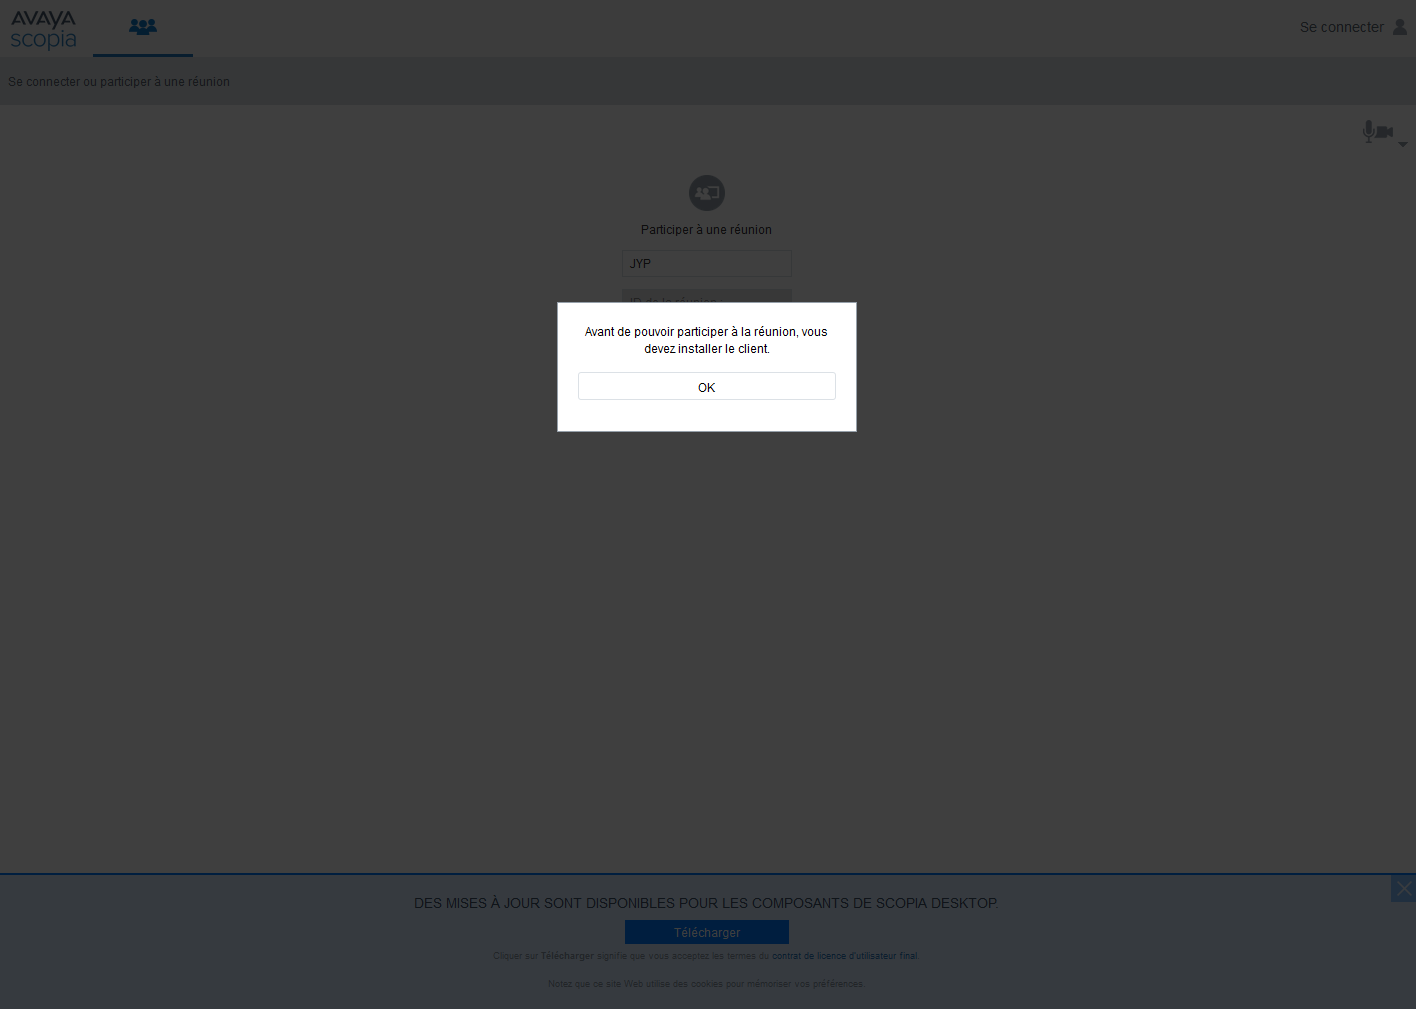
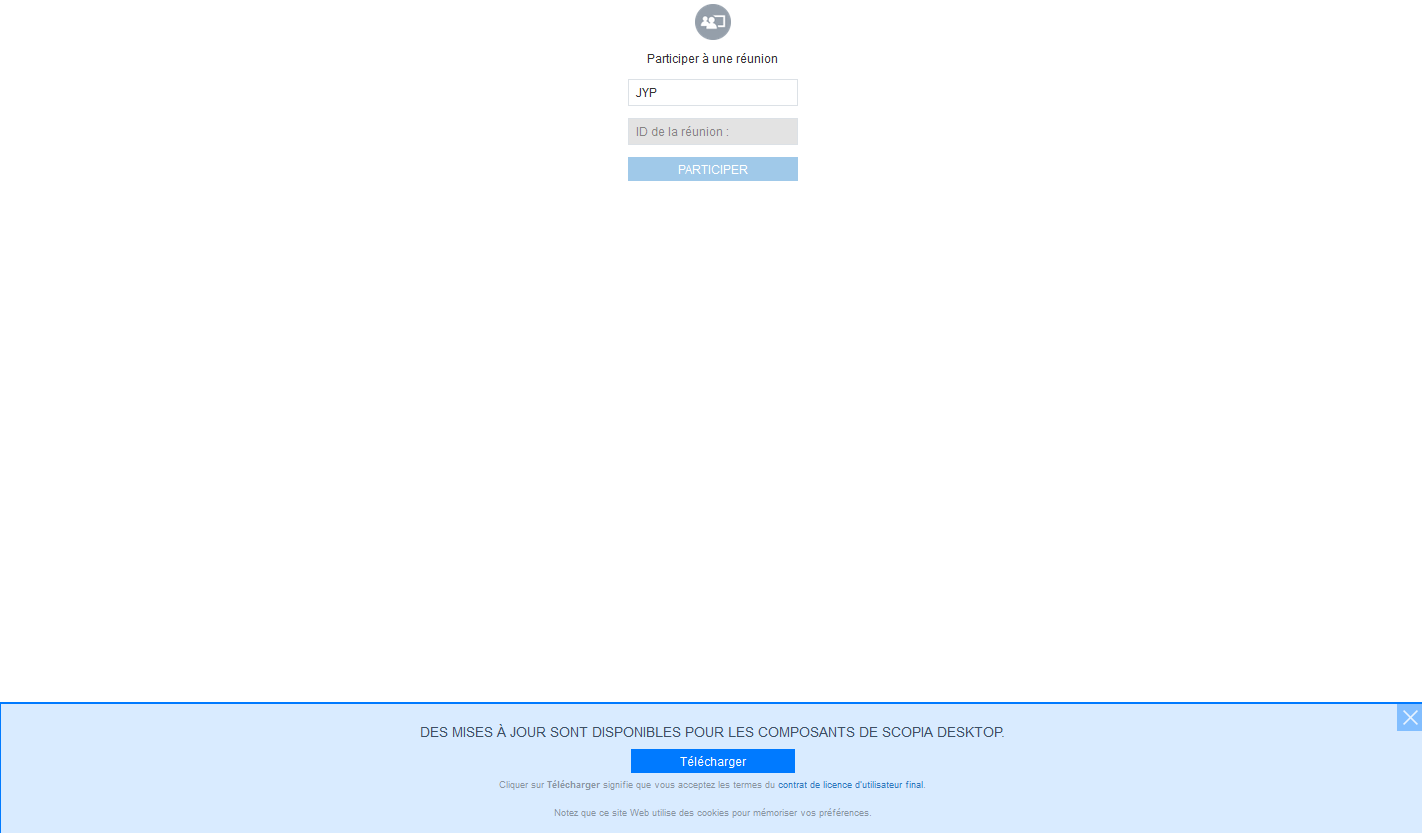
- Click on your meeting link (or the following test meeting link if your meeting has not started yet and you want to practice: http://desktop.visio.renater.fr/scopia?ID=9999***0000&autojoin). This will tell you that you have to install the external client. You may also get this message if you need to update the client. You should type your name in the top text field so that we can identify you easily during the conference
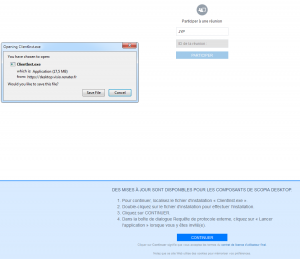
- Click on the Download (Télécharger) link at the bottom of the page

and save the installer somewhere

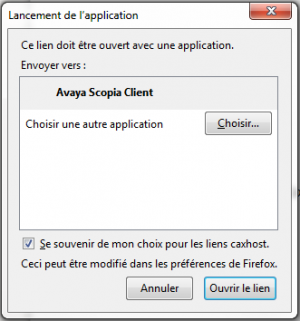
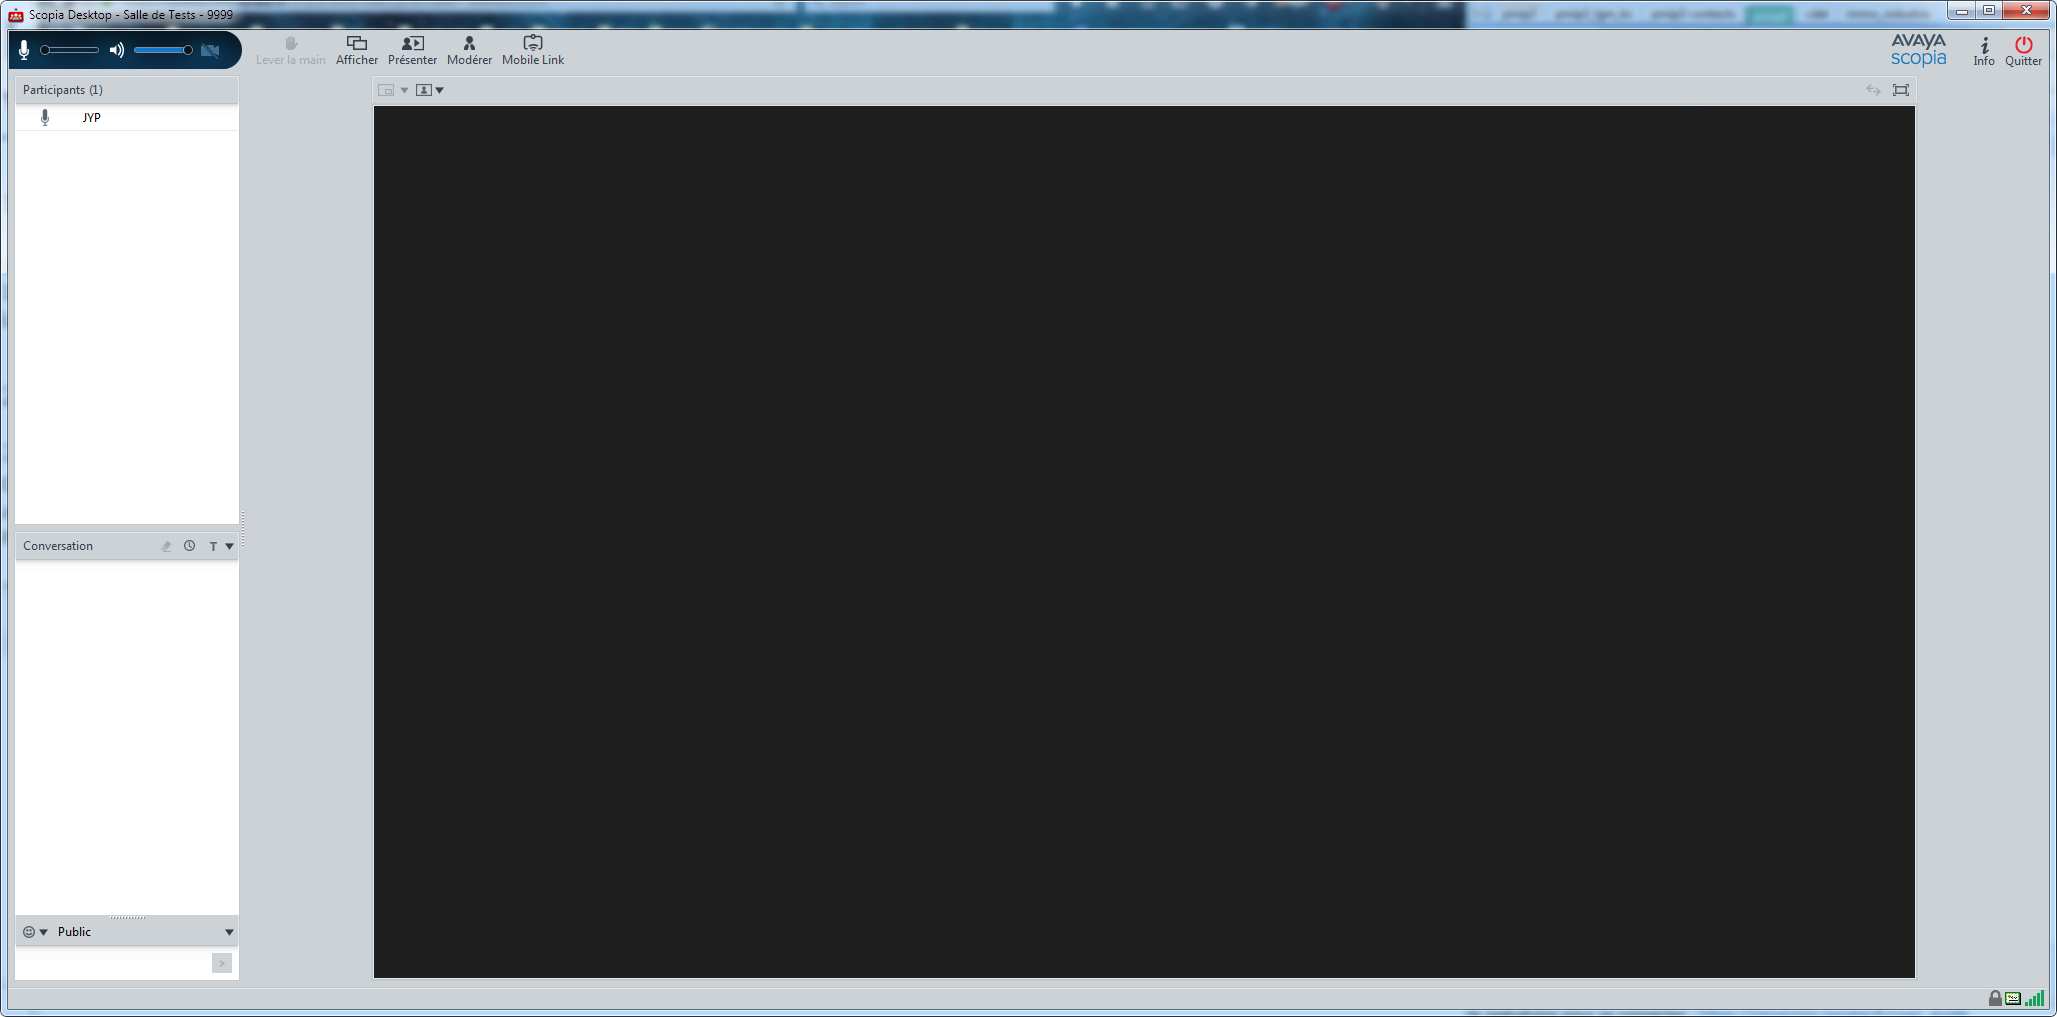
- Execute the Installer and click on Continue (Continuer) on the web page once this is done. This will ask you to confirm that you want to start the Avaya Scopia client (and remember it)
and then start the Scopia Desktop client and connect you to the meeting


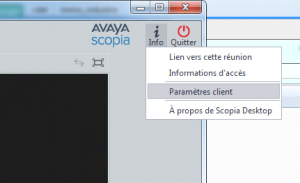
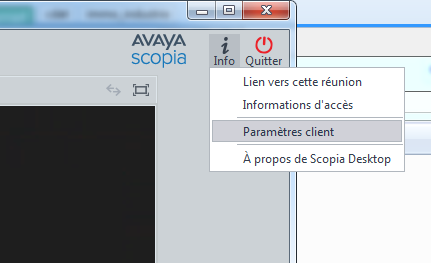
- Open the parameters with the Info button in the upper right corner
and select English
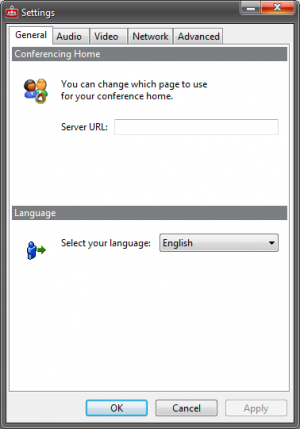

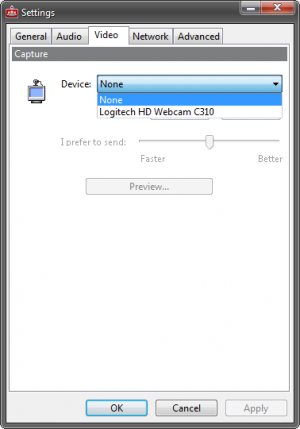
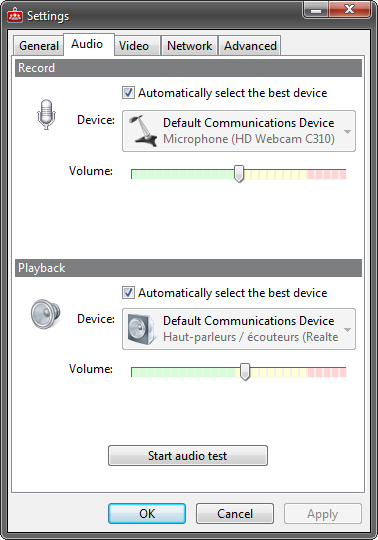
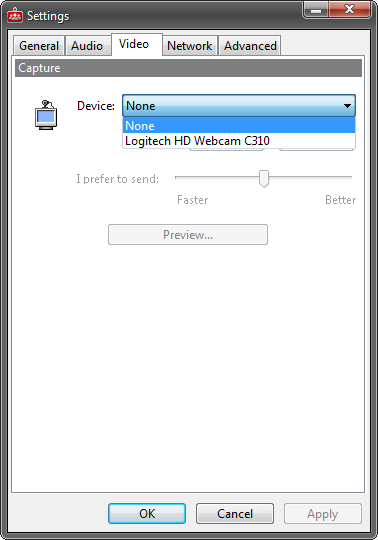
- In the settings panel, make also sure that your microphone and webcam are correctly selected

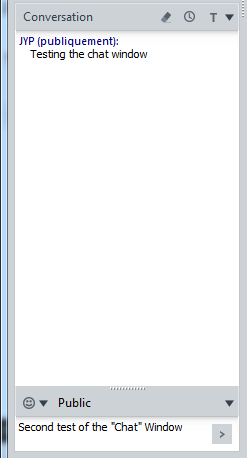
- You should now be ready to actively participate. In case of problems, use the chat (Conversation) panel in the bottom left part of the Scopia Window
[ PMIP3 Wiki Home ] - [ Help! ] - [ Wiki syntax ]