This is an old revision of the document!
Table of Contents
Configuring and using PuTTY/Pageant
PuTTY is a free and easy to use ssh client for Windows (7 and 10). You can use it to connect to your favorite remote Linux servers in text mode, and start remote graphical applications if you also have a running X server
Installation
Download and install the latest version of PuTTY
Launching PuTTY/Pageant
You could directly launch PuTTY, but it is actually more efficient to launch Pageant, especially if you are regularly going to connect to the same server(s)
Start ⇒ PuTTY ⇒ Pageant
- It will seem that nothing happens, but you should get the Pageant icon at the bottom right of your screen.
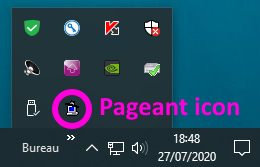
Pageant will allow you to create or use existing connection profiles (Sessions), and also easily use ssh keys (more on ssh keys later)
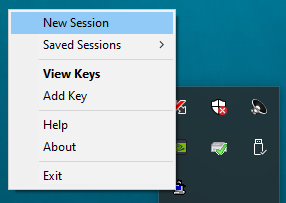
- If you right click on the Pageant icon, you can manage sessions with the
New Sessionoption, useSaved Sessionsprofiles and manage ssh keys (View Keys,Add Key).
You can also view/add keys by double clicking on the pageant icon
Configuring PuTTY
Launch the session/configuration manager: (Right click on) Pageant ⇒ New Session

- You can keep most PuTTY's default settings. This section will show you how to create your first session profile, with some useful options. If you want to add another session later, just
Loadan existing (and properly configured) session,Saveit under a new name, and the change the session details
- When changing a setting, select a (sub-)Category in the left part of the PuTTY Configuration windows, and change the displayed settings in the right part of the window.
- After changing the settings of an existing Session, do not forget to go back to the Session category and click
Save!
Creating a new session
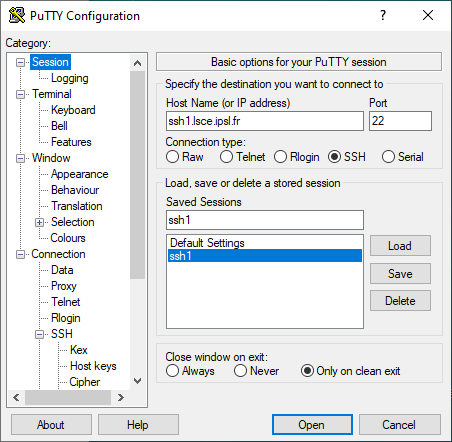
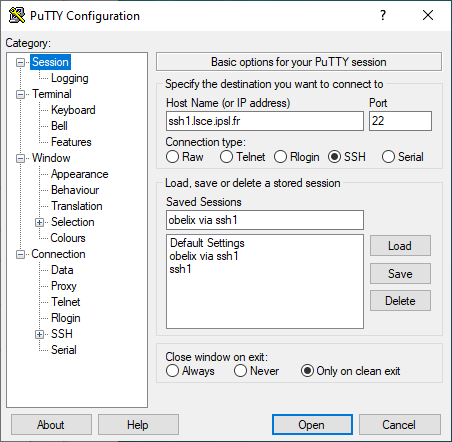
In the Session category:
- Specify a Host Name: e.g.
ssh1.lsce.ipsl.frfor the LSCE access server - Specify a matching session name in Saved Sessions: e.g.
ssh1 - Click on Save to save the session
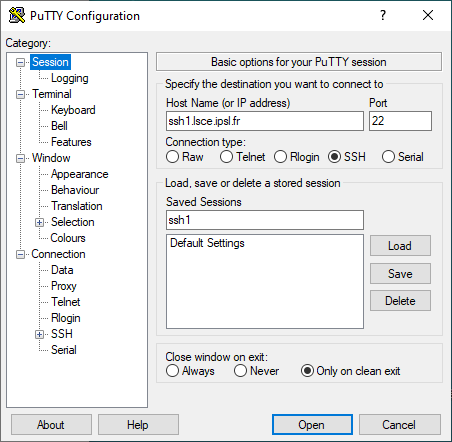
If you are in a hurry, you can connect to the Linux server by clicking on Open, but you should first change some useful settings
Changing some useful settings
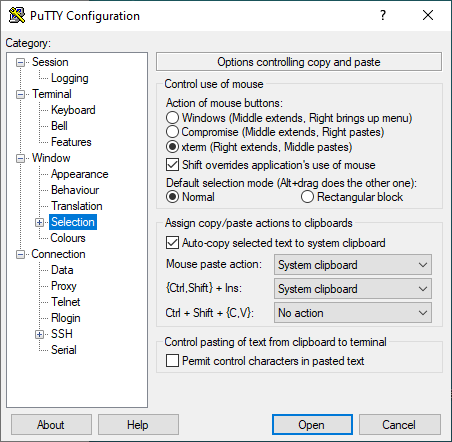
- In the
Windows⇒Selectioncategory:- Select xterm for the mouse buttons behavior. This will allow you to use the mouse buttons in the Putty terminal the same way you would use them in an standard Linux xterm terminal: Copy text with the left button, and Paste it with the middle button
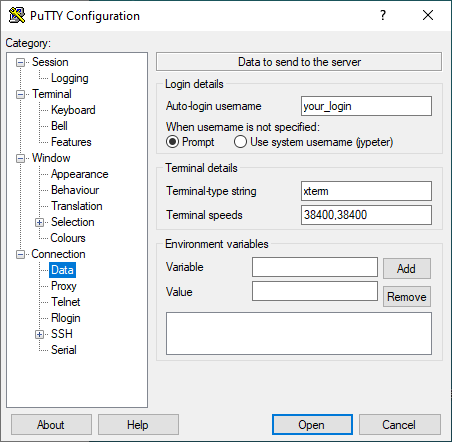
- In the
Connection⇒Datacategory:- Specify your login name in Auto-login username. This way you won't have to type it when you connect to the Linux server
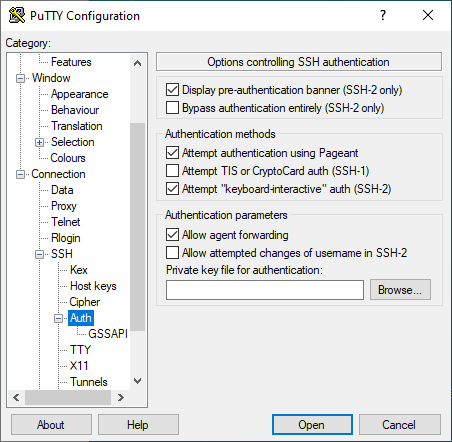
- In the
Connection⇒SSH⇒Authcategory: - In the
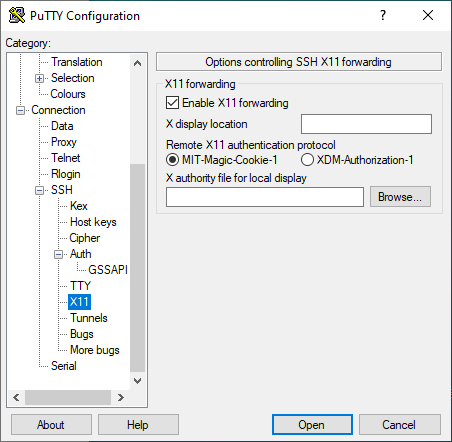
Connection⇒SSH⇒X11category:
- When you have finished updating settings, do not forget to go back to
Category⇒Sessionand Save the session!
Adding more sessions
Direct connection to a remote server
- Select an existing session and click on Load
- Update the Host Name, Saved Session name (the name of the new profile you want) and settings
- Go back to
Category⇒Sessionand Save the session
Connection through a gateway
- Select an existing gateway session and click on Load.
For connecting to LSCE from outside LSCE, select the ssh1 profile - In the
Connection⇒SSHcategory, specify the command used to connect to the target server in the Remote command field
e.g. for LSCE, usessh obelix

- Go back to
Category⇒Session, specify a new profile name in Saved Sessions (e.g.obelix via ssh1) and Save the session
Using Putty/Pageant
Using an pre-defined session
Once you have started pageant, and configured a session,