This is an old revision of the document!
Table of Contents
Configuring and using PuTTY/Pageant
PuTTY is a free and easy to use ssh client for Windows. You can use it to connect to your favorite remote Linux servers in text mode, and start remote graphical applications if you also have a running X server
Installation
Official web site: PuTTY Web site
You can install the latest version of PuTTY directly from Microsoft Store, or download the latest 64-bit msi installer
Launching PuTTY/Pageant
You could directly launch PuTTY (Start ⇒ PuTTY ⇒ PuTTY), but it is actually more efficient to launch Pageant, especially if you are often going to connect to the same server(s)
Starting Pageant: Start ⇒ PuTTY ⇒ Pageant
Pageantis an ssh agent for Windows, but this page also explains how to use it for easily creating and using connection profiles (aka Sessions) to connect to remote Linux servers- Some applications (e.g. WinSCP) will automatically try to use
Pageantas an ssh-agent, instead of asking you to type your ssh passphrase
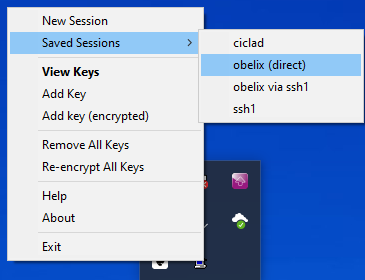
- It will seem that nothing happens when you start
Pageant, but you should get thePageanticon at the bottom right of your screen.
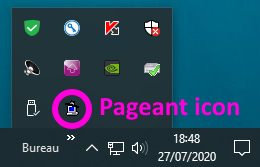
- If you right click on the
Pageanticon, you can manage sessions with theNew Sessionoption, useSaved Sessionsprofiles and manage ssh keys (View Keys,Add Key).
You can also view/add ssh keys by double clicking on the pageant icon
Configuring PuTTY
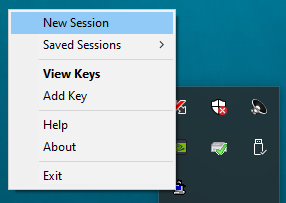
Launch the PuTTY Configuration manager: (Right click on) Pageant ⇒ New Session

- You can keep most PuTTY's default settings. This section will show you how to create your first session profile, with some highly recommended options.
If you want to add another session later, justLoadan existing (and properly configured) session,Saveit under a new name, change the session details, and then save the session again.
- When changing a setting, select a (sub-)Category in the left part of the
PuTTYConfiguration window, and change the displayed settings in the right part of the window.
- After changing the settings of an existing Session, do not forget to go back to the Session category (at the top left of the Putty Configuration window) and click
Save!
Creating a new session
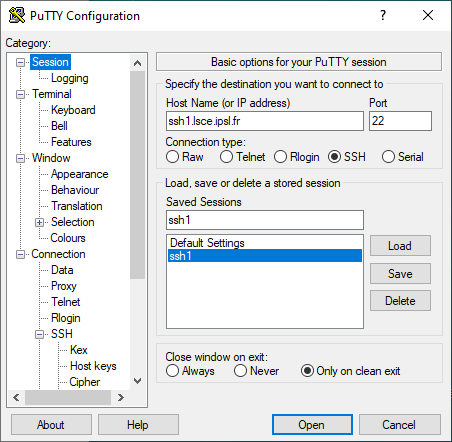
In the Session Category:
- Specify a Host Name: e.g.
ssh1.lsce.ipsl.frfor the LSCE access server (also called LSCE gateway) - Specify a matching session name in Saved Sessions: e.g.
ssh1 - Click on Save to save the new session (that will only have default settings for now)
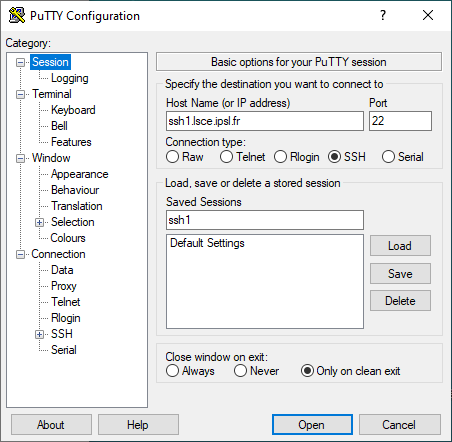
If you are in a hurry, you can connect to the Linux server specified in the Host Name field by clicking on Open
Changing some useful settings
Loadan existing session (e.g. the ssh1 profile defined above), that will serve as a template (with the recommended settings) for the future sessions
- In the
Window⇒Selectioncategory:- Select xterm in the Actions of mouse buttons section.
This will allow you to use the mouse buttons in the PuTTY terminal the same way you would use them in an standard Linux xterm terminal:- Select and Copy text (at the same time) with the left button
- Paste text with the middle button
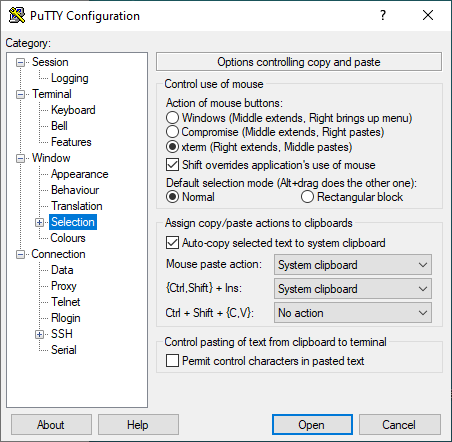
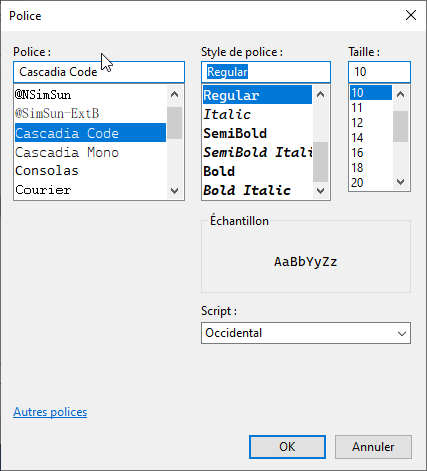
- In the
Window⇒Appearancecategory:- You can choose a font more readable than the default one!
We recommend the Cascadia Code font that comes with the Windows Terminal application (which means that you first have to install Windows Terminal first, but you will probably need it anyway) - Use the
Change…button in theFont settingssection, and selectCascadia CodeandRegular(you can also experiment with styles different fromRegular, and different font sizes)

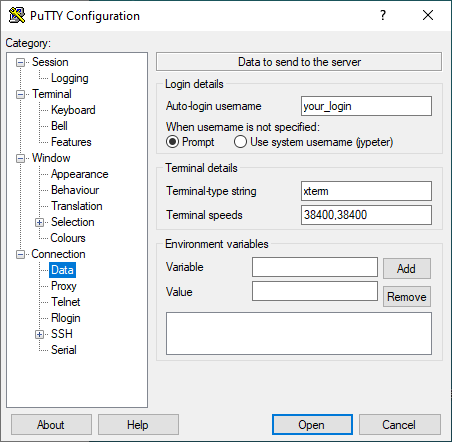
- In the
Connection⇒Datacategory:- Specify your login name (on the LSCE servers) in Auto-login username. This way you won't have to type it when you connect to the Linux server!
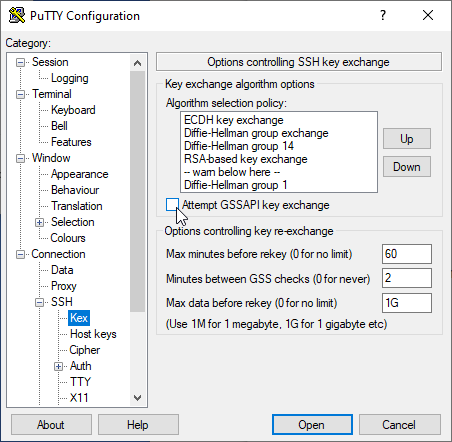
- In the
Connection⇒SSH⇒Kexcategory:- Unselect Attempt GSAPPI key exchange!
If you forget to do this, connecting to a server will seem to take forever (if it works at all)…
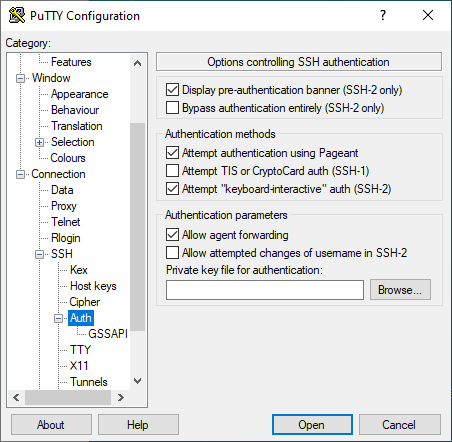
- In the
Connection⇒SSH⇒Authcategory: - In the
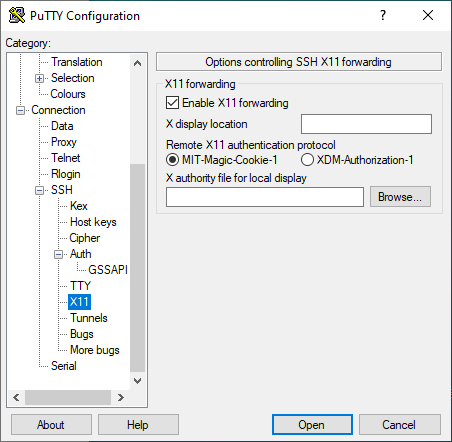
Connection⇒SSH⇒X11category:
- When you have finished updating the settings, do not forget to go back to
Category⇒Sessionand Save the session!
- Click on
Opento connect to the default host with the default settings, and check that things are working properly
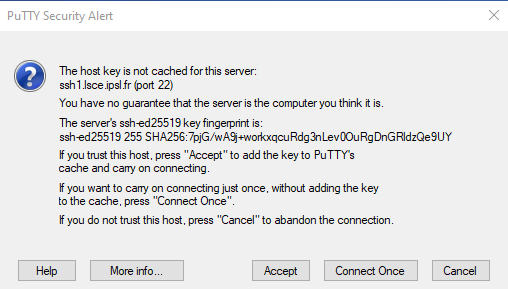
The first time you connect to a server, you will get aPuTTY Security Alertwindow, where you have to click onAcceptto tell PuTTY that you trust the connection to this new server
Adding more sessions
Start Pageant, and then the PuTTY Configuration manager: (Right click on) Pageant ⇒ New Session
Direct connection to a remote server
- Select an existing session (e.g. the ssh1 profile defined above) and click on Load
- Update the values of the Host Name and Saved Session (the name of the new profile you want) text fields, and settings
- connecting to LSCE from INSIDE LSCE:
Host Name⇒obelixSaved Session⇒obelix (direct connection)
- connecting to ciclad:
Host Name⇒ciclad.ipsl.upmc.frSaved Session⇒ciclad- do not forget to specify your ciclad login in:
Connection⇒Data⇒Auto-login username - you will also need an ssh key if you want to connect to
ciclad!!
- Go back to
Category⇒Sessionand Save the session
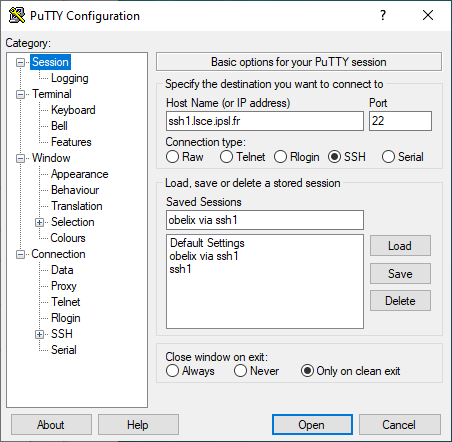
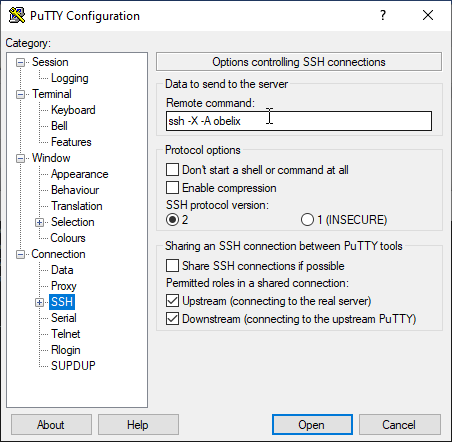
Connection through a gateway
- Select an existing gateway session and click on Load.
For connecting to LSCE from OUTSIDE LSCE, select the ssh1 profile
If you are at LSCE, but use the eduroam or the guest WiFi network, you are considered as being outside LSCE! - In the
Connection⇒SSHcategory, specify the command used to connect to the target server in the Remote command field
e.g. for LSCE, use: - Go back to
Category⇒Session, specify a new profile name in Saved Sessions (e.g.obelix via ssh1) and Save the session
Daily usage of PuTTY/Pageant
Note: PuTTY will ask your password each time you open a session, unless you have ssh keys, and you use Pageant to store your passphrase
Starting a session from Pageant
Once you have started pageant, and configured sessions, you can easily open terminals on the remote servers by right-clicking on the pageant icon, and selecting a Saved Session.
Starting a session from a desktop shortcut
It is possible to create a shortcut on the desktop to start a specific session!
- Right-click on the desktop and select
New⇒Shortcut - Specify the location of
putty.exein the path field, and clickNext:
"C:\Program Files\PuTTY\putty.exe"(with the quotes!) - Specify the name of the shortcut (as it will appear on the desktop), and save the shortcut
e.g.obelix via ssh1 - Right-click on the shortcut and select Properties, then add the name of the desired profile to the content of the Target field
- Warning:
- you have to use an existing session name (as it appears in
Pageant⇒Session⇒Saved Sessions) - you have to use quotes correctly, otherwise you will get an error message!
- Examples:
"C:\Program Files\PuTTY\putty.exe" -load "obelix via ssh1""C:\Program Files\PuTTY\putty.exe" -load "obelix (direct)"
- Click OK to save the changes
- You can now connect to the remote server just by clicking on the desktop shortcut, instead of right-clicking on the Pageant icon!
Using ssh keys
Read the Using ssh keys section if you don't know what ssh keys are
Existing ssh keys
Importing or creating ssh keys with PuTTYgen
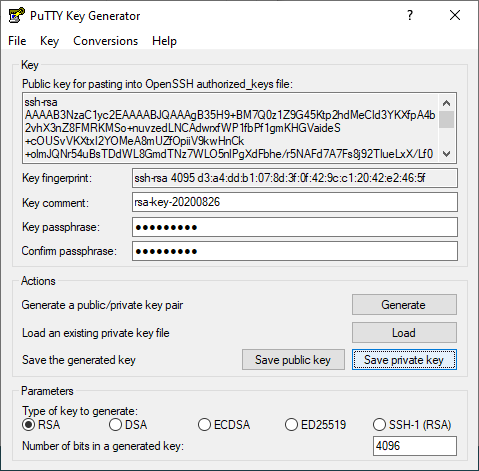
- Launch the PuTTY Key Generator:
Start⇒PuTTY⇒PuTTYgen
- If you already have a private ssh keys generated on another computer,
id_rsa, you just have to use PuTTYgen to import the private key, and save it to a.ppkfile thatPageantcan use- Import the key (and type the passphrase, when asked) with:
Conversions⇒Import key
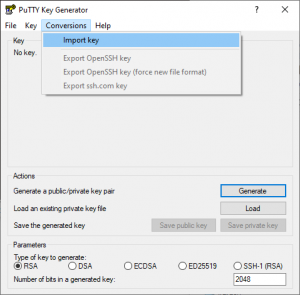
- Then click on the
Save private keybutton, and create aid_rsa.ppkfile (orany_name_you_want.ppk)


- If you don't have a set of ssh keys, follow the steps below to create private and public keys
- Make sure that the type of key (at the bottom of the PuTTYgen window) is
RSAand that the number of bits is4096 - Click on the
Generatebutton and move your mouse to generate some random information - Type your
Key passphraseand confirm it - Click on the
Save private keybutton, and create aid_rsa.ppkfile (orany_name_you_want.ppk)
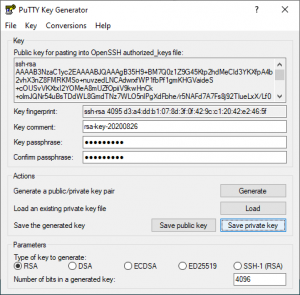
- Click on the
Save public keybutton, and create aid_rsa.pubfile - Click on
Conversions⇒Export OpenSSH key, and create a (standard)id_rsafile
You will not need this file with Putty, but it is just in case you need to use your private key later on a Linux computer
[ PMIP3 Wiki Home ] - [ Help! ] - [ Wiki syntax ]