Table of Contents
Windows Subsystem for Linux 2 (WSL 2), and Ubuntu
Other Windows 10 related notes
JYP is still working on this page! Some content may be out of date, or still related to WSL 1
- What is described on this page was tested with WSL 2.
WSL 2 is available in Windows 11 or Windows 10, Version 1903, Build 18362 or later
- You can also check JYP's original WSL 1 instructions
- …but even if you need WSL 1, you should use this page for installing WSL, and then switch to WSL 1 with --set-default-version or --set-version
- The user can choose to install Linux using WSL 1 or WSL 2
- WSL 2 should be your default choice
- If you have doubts, check the differences between WSL1 and WSL2 and read Exceptions for using WSL 1 rather than WSL 2 before choosing
The commands on this page have to be typed:
- either in Windows PowerShell terminals
- or in bash terminals running in WSL
It should be clear enough which type of terminal you have to use
What is WSL ?
Windows Subsystem for Linux (WSL) lets you run a Linux distribution on your Windows computer, without the overhead of a traditional Virtual Machine (VM) or dual-boot setup
More reading:
- What is WSL? on the Ubuntu wiki site
Prerequisites
Windows version
- A computer running Windows 11 or Windows 10, Version 1903, Build 18362 or later
- Check the installed version on your computer
If you don't have the Windows version required for running WSL, you can:
The basics before starting
Once you have verified that your Windows is recent enough, you should also:
- Install the Windows terminal
- Once Ubuntu is installed, there will be additional ways to open Linux terminals
- Know how to use copy-paste in a Windows Terminal, a PowerShell or a
cmdinterpreter- It should work more or less the same way everywhere as in a cmd interpreter
- Follow the instructions to be able to see hidden folders and files i n the Windows explorer
- Have some basic knowledge of Linux…
- Get some basic Linux documentation if required
Computer CPU and memory
Contrary to other virtual machines, WSL is well integrated with the Windows operating system and the hardware drivers and has a low default CPU and memory footprint!
- You should be able to play with WSL even with 8 Gb of RAM, but 16 Gb is recommended
- Of course, depending on what you need to do on your computer, a better processor will always help
- WSL+Ubuntu will use more CPU and RAM if you use it for running CPU and/or memory intensive processes! As would be the case with any Windows application…

Disk usage
Overview
WSLis part of the Windows operating system and will be installed (and updated) onC:\- The Linux installation(s) will be installed (and updated) on
C:\- They can only be relocated to other partitions afterwards
- ⇒ We should start with at least 10 Gb of free space on
C:\(but more space is always better and safer)- The initial installation will not use much space (2-3 Gb), but we always need space on
C:\for other applications and Windows maintenance (temporary files, updates, …)
 The rather technical Disk usage sections below should be moved somewhere else!
How does it work?
WSL+Linux seems to use a combination of actual Windows files/folders and ext4 Linux partitions stored in .vhdx (Dynamic Virtual Hard Disk) files. The Linux disk (of type ext4) is stored in a single some_name.vhdx Windows file that will automatically grow until it reaches a predefined maximum size of 256 Gb (if there is enough space on the Windows disk…)
- Check Expand the size of your WSL 2 Virtual Hard Disk if you need more than 256 Gb
- Check the following threads if you want to reduce the size of the
vhdxfile:
Disks seen from Linux
The disks and partitions usage, as seen from Linux, can be displayed with df -h
stdu@sadira034:~$ df -h
Filesystem      Size  Used Avail Use% Mounted on
/dev/sdb        251G  1.5G  237G   1% /
tmpfs           6.2G     0  6.2G   0% /mnt/wsl
tools           472G  118G  355G  25% /init
none            6.2G     0  6.2G   0% /dev
none            6.2G  8.0K  6.2G   1% /run
none            6.2G     0  6.2G   0% /run/lock
none            6.2G     0  6.2G   0% /run/shm
none            6.2G     0  6.2G   0% /run/user
tmpfs           6.2G     0  6.2G   0% /sys/fs/cgroup
drivers         472G  118G  355G  25% /usr/lib/wsl/drivers
lib             472G  118G  355G  25% /usr/lib/wsl/lib
C:\             472G  118G  355G  25% /mnt/c
D:\             480G  2.6G  478G   1% /mnt/d
- The
251GSize of/depends on the 256G default size of the growing virtual disk where Linux is installed - The
/mnt/cand/mnt/dare the way to access the WindowsC:andD:disks from Linux, and their Size is the actual size of the Windows disks - Some Filesystems like
driversare actually Windows file systems!stdu@sadira034:/usr/lib/wsl/drivers$ du -sh /usr/lib/wsl/drivers 9.1G /usr/lib/wsl/drivers stdu@sadira034:/usr/lib/wsl/drivers$ du -sh /mnt/c/Windows/System32/DriverStore/ 9.1G /mnt/c/Windows/System32/DriverStore/
Some important disk locations
- Accessing Windows files from Linux:
/mnt/
e.gC:\is available in/mnt/c
- Accessing Linux files from the Windows Explorer:
\\wsl$
- WSL+Ubuntu installation:
- Main directory:
C:\Users\your_login\AppData\Local\Packages\CanonicalGroupLimited.UbuntuonWindows_79rhkp1fndgsc - vhdx file:
C:\Users\jypeter\AppData\Local\Packages\CanonicalGroupLimited.UbuntuonWindows_79rhkp1fndgsc\LocalState\ext4.vhdxstdu@sadira034:~$ ls -lh /mnt/c/Users/jypeter/AppData/Local/Packages/CanonicalGroupLimited.UbuntuonWindows_79rhkp1fndgsc/LocalState/ext4.vhdx -rwxrwxrwx 1 root root 1.2G Aug 24 15:20 /mnt/c/Users/jypeter/AppData/Local/Packages/CanonicalGroupLimited.UbuntuonWindows_79rhkp1fndgsc/LocalState/ext4.vhdx
- Linux swap (virtual memory) file:
stdu@sadira034:~$ ls -lh /mnt/c/Users/jypeter/AppData/Local/Temp/swap.vhdx
-rwxrwxrwx 1 root root 63M Aug 24 14:52 /mnt/c/Users/jypeter/AppData/Local/Temp/swap.vhdx
Sample disk usage
- Disk size after the initial installation of Ubuntu 20.04 LTS
-rwxrwxrwx 1 root root 1.2G Aug 24 15:20 /mnt/c/Users/jypeter/AppData/Local/Packages/CanonicalGroupLimited.UbuntuonWindows_79rhkp1fndgsc/LocalState/ext4.vhdx
- Disk size after upgrading to Ubuntu 20.04.4 LTS with
sudo apt update && sudo apt upgrade
-rwxrwxrwx 1 root root 2.6G Aug 24 15:24 /mnt/c/Users/jypeter/AppData/Local/Packages/CanonicalGroupLimited.UbuntuonWindows_79rhkp1fndgsc/LocalState/ext4.vhdx- Size of the backup tar file of this installation, generated with
wsl --export: ~1.4 Gb
Hyper-V requirements
You can skip reading this WSL requirement if you are installing WSL for the first time, and are therefore directly installing WSL 2
Come back here later (only) if you have problems
WSL 2 needs the Virtual Machine Platform to be enabled on your computer. If you have never used WSL before, you can probably go directly to the Base installation section and wsl should install everything correctly
If you have problems (e.g. The virtual machine could not be started because a required feature is not installed), or if you are updating WSL 1 to WSL 2, type systeminfo in a PowerShell to check if your machine meets the Hyper-V requirements
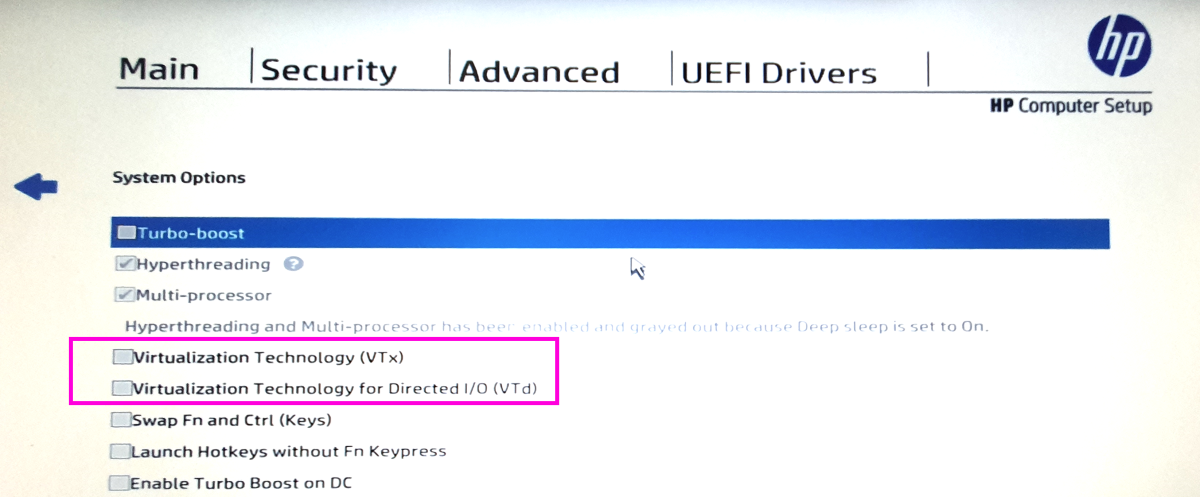
If you get a No for one of the Hyper-V requirements, check the virtualization settings in your computer BIOS.
You can have a look at the x86 virtualization wikipedia page if you are wondering what VT-x and VT-d means for Intel processors (AMD-v and AMD IOMMU for AMD)
Example: HP laptop with an Intel CPU, and virtualization not activated in the BIOS
- Hyper-V section of the
systeminfooutputConfiguration requise pour Hyper-V: Extensions de mode du moniteur d’ordinateur virtuel : Oui Virtualisation activée dans le microprogramme : Non Traduction d’adresse de second niveau : Oui Prévention de l’exécution des données disponible : Oui
- Virtualization section of the HP BIOS: you need to enable
Virtualization Technology (VTx)andVirtualization Technology for Directed I/O (VTd)in the BIOS, save the settings and finish booting - Hyper-V section of the
systeminfooutput with virtualization activated in the BIOS (after activation and reboot)Virtualisation activée dans le microprogramme : Oui
Hyper-V related information
Miscellaneous technical links and information, in case we need this later…
-
hcsdiag listandhcsdiag kill <ID>
Base installation
- Create a system restore point (Créer un point de restauration système), and give it a meaningful name (e.g. Before installing WSL), in the very unlikely case you have to restore it later (i.e. go back to a state where WSL was not activated)
- The steps below (based on Install Linux on Windows with WSL) will work if you have Windows 10 version 2004 and higher (Build 19041 and higher) or Windows 11
- If you have an older Windows version (at least Version 1903, Build 18362), follow the Manual installation steps for older versions of WSL
- Open a
PowerShellin administrator modeStart⇒W⇒Windows PowerShellthen right-click onWindows PowerShelland select Run as Administrator- Use a Windows Terminal, if you have already installed it. Use
CTRL+<left click> onWindows Powershellin the pull-down menu to get aPowershellin administrator mode
- Determine which Linux distributions are (directly) available for installation.
We will use the defaultUbuntudistributionUbuntuwill always automatically upgrade to the latestLTSrelease available (contrary toUbuntu-<even_number>.04that will stick to the specified<even-number>release)- We could specify a specific Linux version (or even import any Linux distribution, or create a custom Linux distribution!)
PS C:\> wsl --list --online

  NAME            FRIENDLY NAME
* Ubuntu          Ubuntu
  Debian          Debian GNU/Linux
  kali-linux      Kali Linux Rolling
  openSUSE-42     openSUSE Leap 42
  SLES-12         SUSE Linux Enterprise Server v12
  Ubuntu-16.04    Ubuntu 16.04 LTS
  Ubuntu-18.04    Ubuntu 18.04 LTS
  Ubuntu-20.04    Ubuntu 20.04 LTS
- Install the latest Ubuntu LTS version available
This step will run pretty quickly
PS C:\> wsl --install -d Ubuntu
Installation en cours : Plateforme de machine virtuelle
Plateforme de machine virtuelle a été installé.
Installation en cours : Sous-système Windows pour Linux
Sous-système Windows pour Linux a été installé.
Téléchargement en cours : Noyau WSL
Installation en cours : Noyau WSL
Noyau WSL a été installé.
Téléchargement en cours : Ubuntu
L’opération demandée est réussie. Les modifications ne seront pas effectives avant que le système ne soit réamorcé.
- Reboot the computer and be patient
- This step will take some time (make sure you have 15-30 mn available). Windows will install and configure what it needs for running WSL+Ubuntu, reboot, and install some more stuff
- The final installation step will take place when you open your Windows session. A terminal opens, displaying the final installation of Ubuntu, and asking you for a username and password, and giving you access to a
bashprompt
Do not use an existing password for the Linux installation Installing, this may take a few minutes... Please create a default UNIX user account. The username does not need to match your Windows username. For more information visit: https://aka.ms/wslusers Enter new UNIX username: stdu New password: Retype new password: passwd: password updated successfully Installation successful! To run a command as administrator (user "root"), use "sudo <command>". See "man sudo_root" for details. Welcome to Ubuntu 20.04 LTS (GNU/Linux 5.10.16.3-microsoft-standard-WSL2 x86_64) * Documentation: https://help.ubuntu.com * Management: https://landscape.canonical.com * Support: https://ubuntu.com/advantage System information as of Tue Aug 23 17:32:20 CEST 2022 System load: 0.0 Processes: 8 Usage of /: 0.4% of 250.98GB Users logged in: 0 Memory usage: 0% IPv4 address for eth0: 172.20.23.145 Swap usage: 0% stdu@sadira034:~$ echo $SHELL /bin/bash
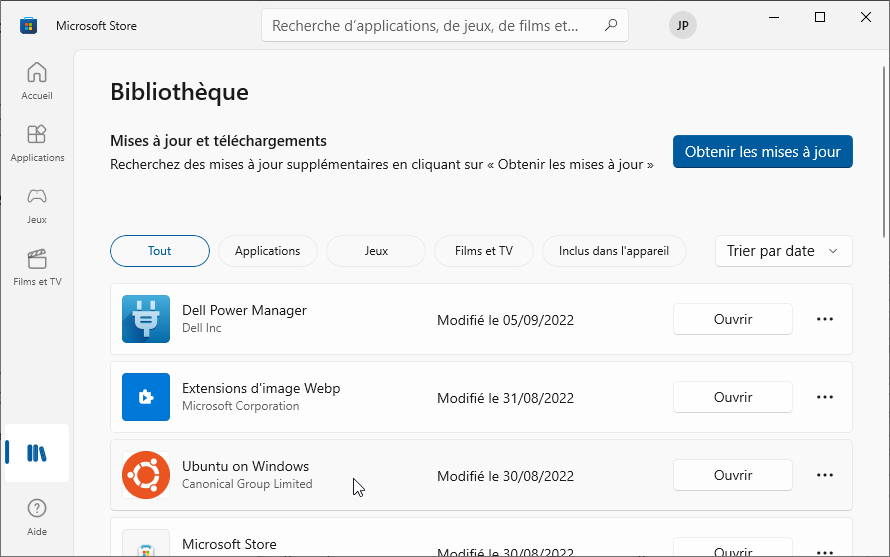
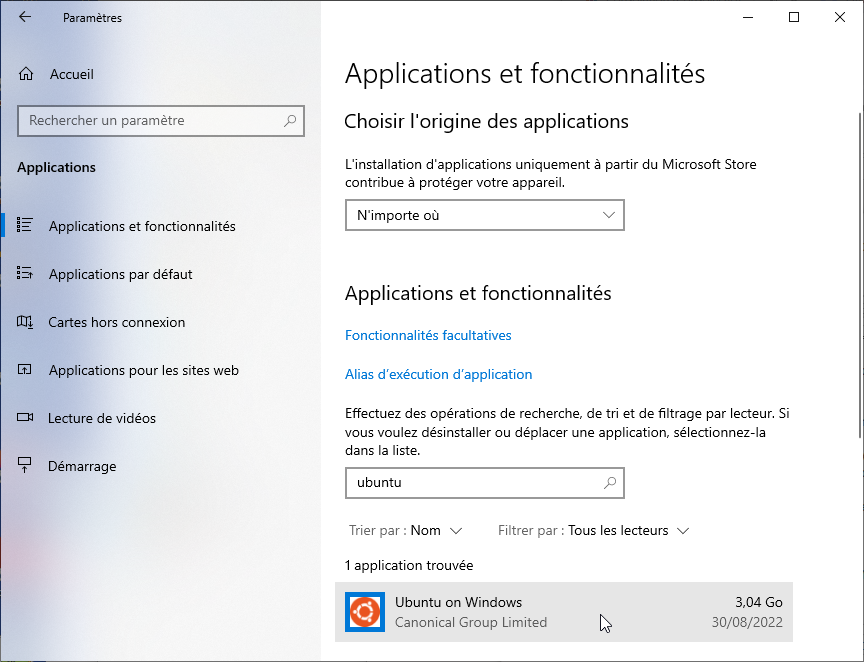
- Note: after installing (even from the PowerShell command line), Ubuntu will appear as a regular installed application in the Microsoft Store and the list of applications
- Get some information about your new
Ubuntuinstallation$ lsb_release -d Description: Ubuntu 20.04.5 LTS
- More information example
- Disk usage example
$ df -h
Filesystem      Size  Used Avail Use% Mounted on
/dev/sdb        251G  1.1G  238G   1% /
tmpfs           6.2G     0  6.2G   0% /mnt/wsl
tools           472G  112G  361G  24% /init
none            6.2G     0  6.2G   0% /dev
none            6.2G  4.0K  6.2G   1% /run
none            6.2G     0  6.2G   0% /run/lock
none            6.2G     0  6.2G   0% /run/shm
none            6.2G     0  6.2G   0% /run/user
tmpfs           6.2G     0  6.2G   0% /sys/fs/cgroup
drivers         472G  112G  361G  24% /usr/lib/wsl/drivers
lib             472G  112G  361G  24% /usr/lib/wsl/lib
C:\             472G  112G  361G  24% /mnt/c
D:\             480G  2.6G  478G   1% /mnt/d
- Get some disk usage information about your
WSLinstallation- From Windows, the installed files are located in
C:\Users\jypeter\AppData\Local\Packages\CanonicalGroupLimited.UbuntuonWindows_79rhkp1fndgsc - From (inside) WSL, the installed files are in
/mnt/c/Users/jypeter/AppData/Local/Packages/CanonicalGroupLimited.UbuntuonWindows_79rhkp1fndgsc/ stdu@sadira034:/mnt/c/Users/jypeter/AppData/Local/Packages$ find /mnt/c/Users/jypeter/AppData/Local/Packages/CanonicalGroupLimited.UbuntuonWindows_79rhkp1fndgsc/ -type f -print /mnt/c/Users/jypeter/AppData/Local/Packages/CanonicalGroupLimited.UbuntuonWindows_79rhkp1fndgsc/LocalState/ext4.vhdx /mnt/c/Users/jypeter/AppData/Local/Packages/CanonicalGroupLimited.UbuntuonWindows_79rhkp1fndgsc/Settings/roaming.lock /mnt/c/Users/jypeter/AppData/Local/Packages/CanonicalGroupLimited.UbuntuonWindows_79rhkp1fndgsc/Settings/settings.dat /mnt/c/Users/jypeter/AppData/Local/Packages/CanonicalGroupLimited.UbuntuonWindows_79rhkp1fndgsc/SystemAppData/Helium/User.dat /mnt/c/Users/jypeter/AppData/Local/Packages/CanonicalGroupLimited.UbuntuonWindows_79rhkp1fndgsc/SystemAppData/Helium/User.dat.LOG1 /mnt/c/Users/jypeter/AppData/Local/Packages/CanonicalGroupLimited.UbuntuonWindows_79rhkp1fndgsc/SystemAppData/Helium/User.dat.LOG2 /mnt/c/Users/jypeter/AppData/Local/Packages/CanonicalGroupLimited.UbuntuonWindows_79rhkp1fndgsc/SystemAppData/Helium/UserClasses.dat /mnt/c/Users/jypeter/AppData/Local/Packages/CanonicalGroupLimited.UbuntuonWindows_79rhkp1fndgsc/SystemAppData/Helium/UserClasses.dat.LOG1 /mnt/c/Users/jypeter/AppData/Local/Packages/CanonicalGroupLimited.UbuntuonWindows_79rhkp1fndgsc/SystemAppData/Helium/UserClasses.dat.LOG2 stdu@sadira034:/mnt/c/Users/jypeter/AppData/Local/Packages$ ls -lh /mnt/c/Users/jypeter/AppData/Local/Packages/CanonicalGroupLimited.UbuntuonWindows_79rhkp1fndgsc/LocalState/ext4.vhdx -rwxrwxrwx 1 root root 1.2G Aug 24 11:37 /mnt/c/Users/jypeter/AppData/Local/Packages/CanonicalGroupLimited.UbuntuonWindows_79rhkp1fndgsc/LocalState/ext4.vhdx
- Note: location of the vhdx swap file:
- From windows:
C:\Users\jypeter\AppData\Local\Temp\swap.vhdx - From WSL:
stdu@sadira034:~$ ls -lh /mnt/c/Users/jypeter/AppData/Local/Temp/swap.vhdx
-rwxrwxrwx 1 root root 63M Aug 24 14:52 /mnt/c/Users/jypeter/AppData/Local/Temp/swap.vhdx
- Update Ubuntu with:
sudo apt update && sudo apt upgradestdu@sadira034:~$ lsb_release -a No LSB modules are available. Distributor ID: Ubuntu Description: Ubuntu 20.04 LTS Release: 20.04 Codename: focal stdu@sadira034:~$ sudo apt update && sudo apt upgrade [sudo] password for stdu: Get:1 http://security.ubuntu.com/ubuntu focal-security InRelease [114 kB] Get:2 http://archive.ubuntu.com/ubuntu focal InRelease [265 kB] [...] 278 upgraded, 32 newly installed, 0 to remove and 0 not upgraded. Need to get 174 MB of archives. After this operation, 305 MB of additional disk space will be used. Do you want to continue? [Y/n] Y [...] stdu@sadira034:~$ lsb_release -a No LSB modules are available. Distributor ID: Ubuntu Description: Ubuntu 20.04.4 LTS Release: 20.04 Codename: focal
- More details about updating WSL and/or Ubuntu (you can safely skip this for now)
- Update the Linux kernel used by WSL, after stopping the running WSL instances
PS C:\> wsl --status
Distribution par défaut : Ubuntu
Version par défaut : 2

La dernière mise à jour effectuée du Sous-système Windows pour Linux date du 23/08/2022
Les mises à jour WSL automatiques sont activées.

Version du noyau : 5.10.16

PS C:\> wsl -l -v
  NAME      STATE           VERSION
* Ubuntu    Running         2

PS C:\> wsl --terminate Ubuntu

PS C:\> wsl -l -v
  NAME      STATE           VERSION
* Ubuntu    Stopped         2

PS C:\> wsl --update
Recherche de mises à jour en cours... Veuillez patienter
Téléchargement de mises à jour en cours... Veuillez patienter.
Installation en cours des mises à jour... Veuillez patienter
Cette modification sera effective au prochain redémarrage complet de WSL. Pour forcer un redémarrage, exécutez « wsl --shutdown ».
Version du noyau : 5.10.102.1

PS C:\> wsl --status
[...]
Version du noyau : 5.10.102.1

PS C:\> wsl cat /proc/version
Linux version 5.10.102.1-microsoft-standard-WSL2 (oe-user@oe-host) (x86_64-msft-linux-gcc (GCC) 9.3.0, GNU ld (GNU Binutils) 2.34.0.20200220) #1 SMP Wed Mar 2 00:30:59 UTC 2022
-
- This will allow you to easily restore or relocate your distribution later
After the base installation
After completing the base installation steps, you get a Ubuntu machine with:
- a root and user account
- the user account is pre-configured to use
sudofor commands that need root access
- pre-installed base Linux applications
- no graphics
- enough to play a bit with a Linux computer and test that the installation is working, but not enough to do some real work
Opening a terminal
Having a terminal you can efficiently interact with is the basis of your future work with WSL+Ubuntu!
- Read the sub-sections below to find out the different ways to open terminals
- Opening the first terminal (after opening a regular Windows session) will start WSL+Ubuntu
- The next terminals will open instantly (because Ubuntu is already running)
- Closing all terminals will not stop WSL+Ubuntu. Read the rebooting WSL section if you need a clean start of WSL without rebooting Windows
Optional reading (if you really have time):
- ConEmu vs Hyper vs Terminus vs MobaXTerm Terminator vs Ubuntu WSL for more details about terminals
The default terminal
The default terminal will be available without installing extra applications like WSLtty or the Windows Terminal. It will work for testing WSL, but it is not recommended if you want to work comfortably
The Default WSL+Ubuntu terminal is basically a bash shell running inside a regular Windows cmd text console. You do not need to have an X server running to use it!
There are several ways to open a default terminal:
- Type
wsl+<Enter>in the (Cortana) Search field on the task bar - The other ways listed below will only work as supposed if you have not restored or relocated a Linux installation!
If you are using a restored/relocated installation, this will trigger a re-installation of the default Ubuntu onC:\. Not a major problem, but it will use some unwanted space onC:\and you will need to use 'wsl --unregister Ubuntu' to remove this unwanted version- Type
ubuntu+<Enter> in the (Cortana) Search field on the task bar - Select Ubuntu from the
Startmenu - Click on the Ubuntu icon on the task bar
- if you don't have a Ubuntu icon on the task bar yet: right-click on the Ubuntu icon (in the
Startmenu) → More → Pin to the task bar - to open more terminals: right-click on the Ubuntu icon on the task bar → Ubuntu
Copy/paste in the default terminal
Check this Windows Terminal section
The WSLtty terminal
- This is the recommended (by JYP) option for now, until we can use regular Linux select-copy/paste in the Windows Terminal (Feature request: add xterm-style select/copy/paste options)
- If you can't open a
WSLttyterminal after upgrading fromWSLtoWSL 2, install the latest version of WSLtty !
WSLtty allows you to use the efficient Mintty as a terminal for WSL. You do not need to have an X server running to use it!
- Use winget (in a PowerShell) to install WSLtty
PS C:\Users\your_login> winget install wsltty
Trouvé WSLtty [Mintty.WSLtty] Version 3.6.0
[...]
Installé correctement
- After installing WSLtty, you will get several new ways to open a terminal:
- A
WSL terminalicon on the desktop, that will be The Way to open a terminal Start⇒U⇒Ubuntu terminal(orUbuntu_custom terminalor something similar if you have restored/relocated a Linux installation)Start⇒W⇒WSL Terminalin theStartmenu- There is also a
W⇒WSLttyfolder, than you probably will not need (more details in Configuration), except possiblyconfigure WSL shortcuts(run after adding or removing WSL distributions, in order to create the respective set of shortcuts in the Start menu)
- Open a terminal and right-click in it to check the available options
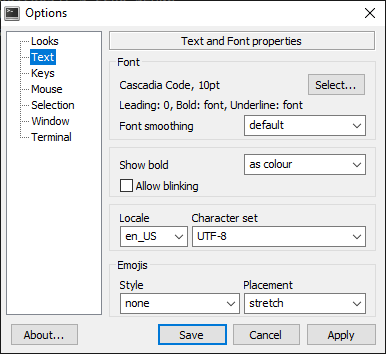
- Recommended text options:
- use the
Textoption to select the nice Cascadia Code font bundled with the Windows Terminal - if you don't automatically get the
en_US.UTF8localization in WSLtty when trying to specify a correct system language, explicitly force Locale=en_USand Character set=UTF-8in the text options 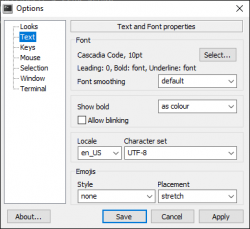
- You can access even more options with CTRL+right-click
- Note: the WSLtty (non-default) settings are stored in:
C:\Users\jypeter\AppData\Roaming\wsltty\config
- You can cycle between the open WSLtty terminals with CTRL+Tab and Shift+CTRL+Tab
- Extra technical stuff (on the Mintty wiki)
The Windows Terminal
The Windows Terminal is really nice and powerful, and will become the recommended (by JYP) option as soon as we can use regular Linux select-copy/paste (Feature request: add xterm-style select/copy/paste options)
Terminals started from Linux
You can install additional graphical terminals in the Linux installation, but you will need to have a running X server if you want to open them. In these terminals, the usual Linux copy/paste rules will apply!
xtermpackagexfce4-terminalpackage
Where are the files?
Accessing Linux files from the Windows Explorer
- You can access the Linux files in
/from Windows by opening the virtual\\wsl$path in the Windows explorer- Your Linux home directory is located in
\\wsl$\Ubuntu\home\<your_login> - There will be some content in
\\wsl$only if a Linux installation is running (i.e. it shows as Running inwsl -l -v) - It's useful to create a shortcut to wsl$ on the desktop
Accessing Windows files from Linux
When you are in a Windows explorer window, you can directly open a Linux terminal in a specific directory by holding Shift and right-clicking on a directory and selecting Ouvrir l'interpréteur de commandes Linux ici (Open the Linux command line here?) in the context menu.
The Windows partitions are mounted under /mnt in Linux:
$ df -h
Filesystem      Size  Used Avail Use% Mounted on
/dev/sdb        251G  1.5G  237G   1% /
[...]
C:\             472G  121G  351G  26% /mnt/c
D:\             480G  4.2G  476G   1% /mnt/d
Read the Mounting disks and network drives section if you want to access remote server disks on your local network, or just want to access USB disks/sticks on your local computer.
Misc
- The
wslpathcommand can be used to make Windows↔Linux path conversion - More technical WSL disks information (move the disk technical information to the advanced usage section, and link to it)
Linux version installed
You can use the following commands to get some information about WSL and the currently installed Linux
$ date
Tue Sep 13 16:48:10 CEST 2022

$ env | grep WSL
WSL_DISTRO_NAME=Ubuntu_custom
WSL_INTEROP=/run/WSL/12_interop
WSL_GUEST_IP=192.168.113.203
WSLENV=
WSL_HOST_IP=192.168.112.1

$ lsb_release -a
No LSB modules are available.
Distributor ID: Ubuntu
Description:    Ubuntu 20.04.5 LTS
Release:        20.04
Codename:       focal

$ cat /proc/version
Linux version 5.10.102.1-microsoft-standard-WSL2 (oe-user@oe-host) (x86_64-msft-linux-gcc (GCC) 9.3.0, GNU ld (GNU Binutils) 2.34.0.20200220) #1 SMP Wed Mar 2 00:30:59 UTC 2022

$ uname -a
Linux sadira034 5.10.102.1-microsoft-standard-WSL2 #1 SMP Wed Mar 2 00:30:59 UTC 2022 x86_64 x86_64 x86_64 GNU/Linux

$ cat /etc/*release*
DISTRIB_ID=Ubuntu
DISTRIB_RELEASE=20.04
DISTRIB_CODENAME=focal
DISTRIB_DESCRIPTION="Ubuntu 20.04.5 LTS"
NAME="Ubuntu"
VERSION="20.04.5 LTS (Focal Fossa)"
ID=ubuntu
ID_LIKE=debian
PRETTY_NAME="Ubuntu 20.04.5 LTS"
VERSION_ID="20.04"
HOME_URL="https://www.ubuntu.com/"
SUPPORT_URL="https://help.ubuntu.com/"
BUG_REPORT_URL="https://bugs.launchpad.net/ubuntu/"
PRIVACY_POLICY_URL="https://www.ubuntu.com/legal/terms-and-policies/privacy-policy"
VERSION_CODENAME=focal
UBUNTU_CODENAME=focal
Ubuntu packages installed
$ dpkg --list | head -n 10
Desired=Unknown/Install/Remove/Purge/Hold
| Status=Not/Inst/Conf-files/Unpacked/halF-conf/Half-inst/trig-aWait/Trig-pend
|/ Err?=(none)/Reinst-required (Status,Err: uppercase=bad)
||/ Name                           Version                           Architecture Description
+++-==============================-=================================-============-===============================================================================
ii  accountsservice                0.6.55-0ubuntu12~20.04.5          amd64        query and manipulate user account information
ii  adduser                        3.118ubuntu2                      all          add and remove users and groups
ii  alsa-topology-conf             1.2.2-1                           all          ALSA topology configuration files
ii  alsa-ucm-conf                  1.2.2-1ubuntu0.13                 all          ALSA Use Case Manager configuration files
ii  apparmor                       2.13.3-7ubuntu5.1                 amd64        user-space parser utility for AppArmor


$ dpkg --list > /mnt/c/Scratch/your_login/Ubuntu_Installed_List_`date +"%y-%m-%d"`.txt
$ wc -l /mnt/c/Scratch/your_login/Ubuntu_Installed_List_*.txt
642 /mnt/c/Scratch/your_login/Ubuntu_Installed_List_22-08-29.txt
Full (example) list of installed packages: ubuntu_installed_list_22-08-29.txt
Update ubuntu
Use the following to update your ubuntu installation:
$ sudo apt update && sudo apt upgrade
or
$ sudo -s

$ apt-get update
$ apt-get upgrade
Managing WSL
This is just place to store some technical information, that will probably not be needed by most people
- News in the Windows Command Line Tools For Developers WSL blog
Getting ready for some real work
sudo -s, or sudo) when executing the apt* installation commands, and other admin commands
Create a backup before starting
Nothing will go wrong, but it does not hurt to save an image of your full installation, in case you want to try some really different settings later.
Specifying a correct system language
WSL will automatically try to use in the terminals the same language as the one used by the Windows computer, but this could lead later to some difficult to debug side-effects when you connect to remote Linux servers (e.g. the sort command may give different results !).
It is safer to force the Linux installation to use a standard English localization. The update-locale command will change the content of the /etc/default/locale file
$ sudo update-locale LANG=en_US.UTF8
$ echo $LANG
en_US.UTF8

$ locale -v
LANG=en_US.UTF8
LANGUAGE=
LC_CTYPE="en_US.UTF8"
[...]
LC_ALL=
After updating the system localization (and possibly restarting wsl with wsl --shutdown), open the available terminals and type echo $LANG in order to check that are indeed getting en_US.UTF8
If you are still not getting en_US.UTF8 in some terminals (e.g. you are still getting C.UTF-8), you can check if you can override the localization options in the terminals settings. Check the Text options of the WSLtty terminals
Package management
How does it work ?
- Ubuntu applications are distributed through package files in Debian format (
.debfiles) that are found in software repositories
- High level package management tools such as
aptitudeorsynapticrely onaptwhich, itself, relies ondpkgto manage the packages in the system- The
apttool merges functionality ofapt-getandapt-cacheand by default has a fancier colored output format, making it more pleasant for humans. For usage in scripts or advanced use cases,apt-getis still preferable or needed apt*tools anddpkgare pre-installed on Ubuntu- aptitude can be used on the command-line or through a text-based interface
- You do not need to have an X server running to use
aptitude, therefore aptitude can be used in the early stages of a Linux installation, or on a remote Linux computer
- synaptic is a graphical package manager
- You need to have an X server running in order to use it
- All the details can be found in The Debian package management tools
What about snap ?
Installing extra package managers
- Installation:
sudo apt install aptitude synaptic- It may install lots of dependencies, but that's to be expected if no other packages have been installed yet
$ sudo apt install aptitude synaptic
Reading package lists... Done
Building dependency tree
Reading state information... Done
[...]
The following NEW packages will be installed:
  adwaita-icon-theme aptitude aptitude-common at-spi2-core cpp cpp-9 fontconfig gcc-9-base
[...]
  x11-xserver-utils xdg-utils
0 upgraded, 129 newly installed, 0 to remove and 0 not upgraded.
Need to get 31.2 MB of archives.
After this operation, 137 MB of additional disk space will be used.
Do you want to continue? [Y/n]
- Documentation:
apt:- FR: apt @ ubuntu-fr
aptitude:synaptic:
Some useful commands
apt update: update the list of packages known by your systemapt upgrade: upgrade all the packages on your systemapt search word: find packages whose description containwordapt install foo: install thefoopackage and all its dependenciesapt show package: print the detailed information of a packageapt remove foo: remove the foo package from your system
dpkg -l: list installed packagesdpkg -L package_name: list files installed frompackage_namedpkg -S path/command: name of the package used to installpath/command
Example
$ dpkg -l | grep -i wsl
ii  ubuntu-wsl                        1.450.2                           amd64        Ubuntu on Windows tools - Windows Subsystem for Linux integration
ii  wslu                              2.3.6-0ubuntu2~20.04.0            all          collection of utilities for the Windows 10 Linux Subsystem

$ dpkg -L wslu
/.
/usr
/usr/bin
/usr/bin/wslfetch
/usr/bin/wslsys
/usr/bin/wslupath
/usr/bin/wslusc
/usr/bin/wslvar
/usr/bin/wslview
[...]

$ apt show wslu
Package: wslu
Version: 2.3.6-0ubuntu2~20.04.0
[...]
Description: collection of utilities for the Windows 10 Linux Subsystem
[...]
Adding useful packages
There is not that much installed by default in Ubuntu, and we use apt insall to get ready for some real work!
$ sudo apt install gcc libglu1-mesa mesa-utils x11-apps xterm xfce4-terminal emacs evince eog imagemagick nco cdo netcdf-bin ncview
Notes:
- Some of the installed packages (
nco cdo netcdf-bin ncview) are used for handling data files in NetCDF format may not be useful to people outside LSCE - Adding lots of extra packages requires much more disk space, and the size of the
.vhdxwill increase significantly!$ ls -lh /mnt/d/WSL_Distributions/Ubuntu_custom/ext4.vhdx 4.7G Sep 16 18:02 /mnt/d/WSL_Distributions/Ubuntu_custom/ext4.vhdx
- Size of the backup after adding the extra packages: we go from 549 Mb to 1.2 Gb!
1.2G Sep 19 13:52 WSL_Ubuntu_20.04.5_LTS_stdu_22-09-19.tar.gz
Using an X server
You will need to have an X server running locally on your Windows 10 machine if you want to display graphics generated by the Linux running locally, or on a remote server. Applications running in text mode only (e.g. vi) do not require a running X server.
You will get a Can't open display error if no server is running (even if the DISPLAY variable is correctly defined)
your_login@your_machine:~$ echo $DISPLAY
localhost:0.0
your_login@your_machine:~$ xterm &
xterm: Xt error: Can't open display: localhost:0.0
[Everything is fine after starting a local X server]
jyour_login@your_machine:~$ xterm &
[1] 55
Installing an X server
Read the Installing and configuring an X server page
Configuration (in your local Linux account)
- Set the
DISPLAYvariable in the shell by hand, or automatically in the shell configuration file(s):- bash shell:
export DISPLAY=localhost:0.0
Can be defined in the~/.bashrcfile - tcsh shell:
setenv DISPLAY localhost:0.0
Can be defined in the~/.login, or the~/.cshrcfile
- Warning!
export DISPLAY=:0.0will also work for using graphics locally, but will fail when trying to use graphics on a remote computer, with aconnect /tmp/.X11-unix/X0: No such file or directoryerror message (source)
- X server and WSL2 : check
export DISPLAY=$(cat /etc/resolv.conf | grep nameserver | awk '{print $2}'):0.0in How to install Ubuntu 20.04 on Windows using WSL
Updating WSL and ubuntu
WSL
Nothing to do! WSL is automatically updated, provided you have enabled the Get updates for other Microsoft products option
Updating ubuntu
The Ubuntu 16.04.3 LTS that was initially installed from the Windows Store when the test computer was running Win 10 1709 was automatically updated to Ubuntu 18.04.2 LTS when the computer was updated to Win 10 1809.
$ lsb_release -a
No LSB modules are available.
Distributor ID: Ubuntu
Description:    Ubuntu 18.04.2 LTS
Release:        18.04
Codename:       bionic
We also ran the do-release-upgrade command to complete the upgrade (from 16.04 to 18.04) [ More info from WSL team - more info from Ubuntu ]
And we then ran the usual upgrade commands. These commands can be run any time for updating the installed packages
$ sudo -s
$ apt-get update
$ apt-get upgrade
Full list of the resulting installed packages, generated with
$ dpkg --list >$ dpkg --list > /mnt/h/Scratch/jyp/pkg_190221.txt
$ wc -l /mnt/h/Scratch/jyp/pkg_190221.txt
578 /mnt/h/Scratch/jyp/pkg_190221.txt
Upgrading Ubuntu
You can skip this section if you have just installed Ubuntu, since you are already running the latest stable release available
The updates are for maintaining the same version of Ubuntu (e.g. you go from version 18.04.2 to 18.04.5), while upgrades are for going from one major version to the next (e.g 16.xx ⇒ 18.xx ⇒ 20.xx). We try to only use the stable major releases, that have an even version number.
We use the LTS versions (Long Time Support) to ensure even more stability, which means that we will get updates of a given major release for quite some time after the next major release is available, so it is not mandatory to upgrade Ubuntu if you are still receiving updates for the (major) release you are using
There should not be any risk, but it may be a good idea to create a backup of your current Ubuntu before upgrading it!
Use sudo for each command below, or just become root by using sudo su -
- before the Linux upgrade:
- Check how much space is left on
C: - make sure you have a network connection
- read the official WSL Upgrading your distribution instructions
- Launch the upgrade with the
do-release-upgradecommand and follow the instructions- if you get a There is no development version of an LTS available message, use
do-release-upgrade -d - if you get a Please install all available updates for your release before upgrading message, use
apt-get dist-upgradeand then trydo-release-upgrade -dagain (see How to Solve the Upgrade Ubuntu Install Updates Error) - if you get
sleep: cannot read realtime clock: Invalid argumenterror, temporarily replace thesleepbinary with an executable empty file. Do not forget to restore the original sleep command after the upgrade!!# sleep 1 sleep: cannot read realtime clock: Invalid argument # mv /bin/sleep /bin/sleep.back # ls -l /bin/sleep.back -rwxr-xr-x 1 root root 35000 Jan 18 2018 /bin/sleep.back # touch /bin/sleep # chmod +x /bin/sleep # sleep 1 #
- Note: you may have to use the empty sleep command trick again, if the sleep command itself is updated and breaks the upgrading process again. Do not forget to restore the original sleep command after the upgrade!!
[...]
Restarting services possibly affected by the upgrade:
  cron: stopping...sleep: cannot read realtime clock: Invalid argument
dpkg: error processing package libpam0g:amd64 (--configure):
 installed libpam0g:amd64 package post-installation script subprocess returned error exit status 1
E: Sub-process /usr/bin/dpkg returned an error code (1)
# ls -l /bin/sleep
-rwxr-xr-x 1 root root 39256 Sep  5  2019 /bin/sleep
# mv /bin/sleep /bin/sleep.back2
# touch /bin/sleep
# chmod +x /bin/sleep
#
- Do not forget to restore the correct
sleepexecutable, if you had to move it# ls -l /bin/sleep* -rwxr-xr-x 1 root root 0 Aug 23 23:57 /bin/sleep -rwxr-xr-x 1 root root 35000 Jan 18 2018 /bin/sleep.back -rwxr-xr-x 1 root root 39256 Sep 5 2019 /bin/sleep.back2 # cp -p /bin/sleep.back2 /bin/sleep # ls -l /bin/sleep* -rwxr-xr-x 1 root root 39256 Sep 5 2019 /bin/sleep -rwxr-xr-x 1 root root 35000 Jan 18 2018 /bin/sleep.back -rwxr-xr-x 1 root root 39256 Sep 5 2019 /bin/sleep.back2
Cleaning up things
Advanced configuration
Get Linux configuration files
- You can either adapt your existing Linux configuration files (
.profile,.bashrc, …) from another Linux computer, or download some example files in your WSL home directory and use (and improve) them as suggested below (or as you wish)$ cd $ scp -pr <your_login>@ssh1.lsce.ipsl.fr:/home/users/jypeter/WSL_config .
- You get a default
.bashrcfile in your home directory when your WSL account is created. Add the following line at the end of~/.bashrcto use what is defined in the downloadedWSL_configdirectory:
source ~/WSL_config/bashrc_extra.sh - If you use the emacs text editor, you can use your own
.emacsconfiguration file, or get an example configuration file the following way:$ cd $ ln -s WSL_config/emacs .emacs
- Font configuration (type, size, …):
- You can either copy the full
.sshdirectory of your Linux account, or just get the private key files:$ cd $ scp -pr <your_login>@ssh1.lsce.ipsl.fr:.ssh .
- Make sure you also read the ssh, agent and keys related questions section below!
ssh, agent and keys related questions
This assumes that you have already created a private/public ssh key pair and that the private key is available somewhere in the Windows 10 computer
ssh from WSL
Authorizing ssh to use old dsa keys
dsa ssh keys are disabled by default (becoming obsolete). ssh will ask for your password even if you have a ~/.ssh/id_dsa file. ssh -v will print Skipping ssh-dss key /home/<your_login>/.ssh/id_dsa - not in PubkeyAcceptedKeyTypes. The solution is to generate a new couple of public/private keys not based on dsa encryption, or to use the user ssh config file to authorize dsa (source)
- Add
PubkeyAcceptedKeyTypes +ssh-dssto~/.ssh/config(before theHOSTsections) - Make sure the config file has the correct access rights:
chmod 600 config
Using Putty Pageant as an ssh agent
This assumes that you have installed the full Putty package (with the msi installer), converted your private ssh key with PuTTYgen, and unlocked the converted ssh private key in Pageant.
The converted ssh private key is located in a Windows 10 folder
- Download the required binaries from the weasel-pageant github page and extract them to a Windows directory, e.g.
C:\Utils\weasel-pageant-x.x - Add the following line to your
~/.bashrcfile:
eval $(/mnt/c/Utils/weasel-pageant-x.x/weasel-pageant -rb -a $HOME/.weasel-pageant.sock)- This is done by default in the
~/WSL_config/bashrc_extra.shif you have downloaded and adapted it
- Open a new terminal:
- Type
ssh-add -l: it will display eitherThe agent has no identities, or as many lines as you have entered keys in Pageant - Type
ssh user@hostto connect to a computer where you have your public key
Note: the other similar solutions are ssh-agent-wsl (the key is stored in the Windows ssh-agent instead of Pageant) or wsl-ssh-pageant
Using Ubuntu as an ssh-agent
The ssh key (and other ssh settings) are in the ~/.ssh directory of your WSL+Ubuntu account
This is the most simple setting, but there will be one running ssh-agent per terminal, and the key will be stored independently for each terminal (which means that you will have to type ssh-add and your pass-phrase for each terminal)
- It's not possible by default to add a key to ssh-agent ('ssh-add' will print
Could not open a connection to your authentication agent) - If you want to use
ssh-addin a terminal, you first need to typeeval `ssh-agent -s`in the (oreval $(ssh-agent))- In that case, it's just easier to add
eval $(ssh-agent)to the.bashrcfile!- This is done by default in the
~/WSL_config/bashrc_extra.shif you have downloaded and adapted it
Notes & TODO
- See if a solution appears for WSL: Keeping ssh private key accessible as long as I don't restart Windows 10 (like the behaviour of pageant)
- See if we can use something from Sharing SSH keys between Windows and WSL 2
ssh to WSL
Maybe check OpenSSH-Server connection issues
Maybe it could be useful to do a ssh from the Win10 part of the machine to the WSL part, and from outside the machine to the WSL part
It would probably already be enough to enable the ssh server on Win10 (the ssh 1709 release beta features are now officially in Win10)
Creating shortcuts to Linux programs on the Windows desktop
- Install wslu (A collection of utilities for WSL) if it is not already installed
apt-get install wslu
- You can create a shortcut by using
wsluscin any Linux terminal- e.g. you can create a shortcut on the Windows desktop to start emacs (in WSL!) with:
wslusc -g emacs- This will make it easier to start emacs, but since this is a graphical Linux application, you need to have an X server running before you click on the emacs shortcut!
- You can optionally get some information about the technical details
Mounting disks and network drives
By default, the local disks and the external USB disks available (and decrypted!) when WSL is started (i.e. when the first WSL terminal is opened) are automatically available (mounted) in /mnt : the content of C:\ is available in /mnt/c, etc… The list of available disks is refreshed when the Windows session is restarted (the user logs out and in, or Windows is rebooted) or when just WSL is restarted.
Extra local disks or network drives (what you can access by opening \\dfshost\dfs\ in the file explorer when you are on the LSCE network) can be either mounted on the fly with the mount command, or automatically by configuring the /etc/fstab file.
You will access the network drives with the access rights you have in the current Windows session (and you may have to access the drives in Windows before you can mount them in WSL)
Warning! In all cases, the owner, groups and permissions displayed may not be accurate (but the actual access rights will apply).
- the user/group of the files may appear as
your_login/your_loginorroot/root. Example of a local file belonging to the current Windows jypeter user, and a system file$ ls -l /mnt/c/Users/jypeter/Desktop/File_on_Desktop.txt -rwxrwxrwx 1 jypeter jypeter 0 Jan 21 11:50 /mnt/c/Users/jypeter/Desktop/File_on_Desktop.txt $ ls -l /mnt/c/Windows/notepad.exe -r-xr-xr-x 3 jypeter jypeter 181248 Mar 19 2019 /mnt/c/Windows/notepad.exe
- the access rights may appear as
rwxrwxrwxeven if the actual rights are more restrictive. Example after mounting the LSCE/home/scratch01disk# File access rights seen from WSL+Ubuntu $ ls -l /mnt/scratch01/jypeter/Chrome_backup.zip -rwxrwxrwx 1 root root 2755154 Jan 13 15:10 /mnt/scratch01/jypeter/Chrome_backup.zip # Actual access rights (on the Linux server) >ls -l /home/scratch01/jypeter/Chrome_backup.zip -rw-r--r-- 1 jypeter lsce 2755154 Jan 13 15:10 /home/scratch01/jypeter/Chrome_backup.zip # You can't change the access rights from WSL+Ubuntu, but you can remove a file, or create a new one $ chmod 600 /mnt/scratch01/jypeter/Chrome_backup.zip chmod: changing permissions of '/mnt/scratch01/jypeter/Chrome_backup.zip': Operation not permitted $ rm /mnt/scratch01/jypeter/Chrome_backup.zip $ ls -l /mnt/scratch01/jypeter/Chrome_backup.zip ls: cannot access '/mnt/scratch01/jypeter/Chrome_backup.zip': No such file or directory $ touch /mnt/scratch01/jypeter/new_file_from_wsl.txt jypeter@lsce5203:/mnt/scratch01/jypeter$ ls -l /mnt/scratch01/jypeter/new_file_from_wsl.txt -rwxrwxrwx 1 root root 0 Jan 21 11:37 /mnt/scratch01/jypeter/new_file_from_wsl.txt # The new file has the correct (default) access rights on the Linux server >ls -l /home/scratch01/jypeter/new_file_from_wsl.txt -rw-r--r-- 1 jypeter lsce 0 Jan 21 11:37 /home/scratch01/jypeter/new_file_from_wsl.txt
Enabling metadata
Some access rights handling can be slightly improved by automatically enabling the metadata mount option. This will allow you to use chmod/chown on local NTFS disks (disks directly connected to your computer, e.g. /mnt/c/Users/your_login).
- become root in a terminal with:
sudo -s - create a
/etc/wsl.confwith the following content:[automount] options = "metadata"
You need to restart WSL+ubuntu to activate the new content of /etc/wsl.conf. See below an example of the mount -l output:
- Before:
C: on /mnt/c type drvfs (rw,noatime,uid=1000,gid=1000,case=off) - After enabling metadata:
C: on /mnt/c type drvfs (rw,noatime,uid=1000,gid=1000,metadata,case=off)
Optional: more details about wsl.conf in WSL launch settings, How to use wsl.conf and metadata and access rights management
On-the-fly mount
You have to create a mount point in the existing /mnt directory and then use the mount command
# Must be root for most 'mount' related commands
$ sudo -s

# Create the mount point (once), e.g. for accessing /home/scratch01 on the local LSCE servers
# This works when the Windows 10 computer is on the LSCE network
$ mkdir /mnt/scratch01

# Mount the remote disk
$ mount -t drvfs '\\dfshost\dfs\scratch01' /mnt/scratch01

# List the mounted disks
$ mount -l
[...]
\\dfshost\dfs\scratch01 on /mnt/scratch01 type drvfs (rw,relatime,case=off)

# Unmount the disk, or just shutdown Windows or WSL when you are finished
$ umount /mnt/scratch01
If you connect a USB disk/stick and windows sees it as a new J:\ drive, you can also manually mount it
$ sudo -s

# Create the mount point (once)
$ mkdir /mnt/j

# Mount the USB disk
$ mount -t drvfs J: /mnt/j

# Unmount the disk, or just shutdown Windows or WSL when you are finished
$ umount /mnt/j
Automatic mount
The disks defined in /etc/fstab will be automatically mounted when you start WSL and if they are actually accessible from your Windows session (e.g. \\dfshost\dfs can only be accessed from the LSCE network)
You need to add 1 line per mount point to /etc/fstab, and create (once) the directories that will be used for mounting the disks
$ sudo -s

# Create the mount points (once)
# The example below is to access the LSCE /home/users and /home/scrath01 disks
$ mkdir /mnt/users /mnt/scratch01

# Make a backup copy of /etc/fstab before modifying it (for safety reasons!)
$ cp -p /etc/fstab /etc/fstab.bak

# Add lines to /etc/fstab associating mount points and directories
$ cat /etc/fstab
LABEL=cloudimg-rootfs   /        ext4   defaults        0 0
\\dfshost\dfs\users /mnt/users drvfs defaults 0 0
\\dfshost\dfs\scratch01 /mnt/scratch01 drvfs defaults 0 0

# Try to mount all the disks in /etc/fstab
$ mount -a

# Check the result
$ mount -l
[...]
\\dfshost\dfs\users on /mnt/users type drvfs (rw,relatime,case=off)
\\dfshost\dfs\scratch01 on /mnt/scratch01 type drvfs (rw,relatime,case=off)
Accessing remote file systems with sshfs
It seems this can be done with a combination of WinFsp and SSHFS-Win (see SSHFS remote directory mounting syntax for details
Extra resources
Useful mount options:
mount -a(must be root): mount everything specified in/etc/fstabumont /mnt/scratch01(must be root): unmount the disk accessible through/mnt/scratch01mount -l: list all the mounted disks and the mount options (useful when you are using the default mount options and want to know which options were actually applied)
Useful links (used for writing this section):
- Chmod/Chown WSL Improvements (the new metadata option)
Rebooting WSL
It is not possible to stop or reboot WSL like a regular Linux computer
shutdown -r nowwill generate an error message- WSL keeps on running even when all the Linux terminals are closed
Shutting down or rebooting the Windows computer will of course stop WSL but it's useful to be able to just stop/restart WSL in order to:
- force WSL to recognize new disk drives and make them available as
/mnt/<new_drive_letter - force WSL to recognize drives that were still encrypted when the first WSL terminal was opened
WSL can be stopped the following way. Warning: all the open terminals and running processes will be terminated!
- from a Windows terminal (
cmd,PowerShell, … no need to run as administrator):- Get the name of the installed (and running) Linux:
wsl --list --verbose - Stop this instance of Linux (e.g. if it is named Ubuntu):
wsl --terminate Ubuntu - or Stop all the currently running Linux distributions:
wsl --shutdown
Advanced usage
WSL security WARNING!
A regular Linux installation (on a Linux-only computer) is fairly secure,
but a Linux installation on WSL is not secure at all, by design
WSL+Linux is designed to allow you to easily use Linux on Windows, including very easily using the Linux root account without knowing any password of the Linux installation!
PS C:\Users\your_login> wsl
wsl_default_user@your_machine:/mnt/c/Users/your_login$ whoami
wsl_default_user

PS C:\Users\your_login> wsl -u root
root@your_machine:/mnt/c/Users/your_login# whoami
root
This is a feature and not a security issue, because your installation is protected by your Windows account security
You should be aware (and act accordingly) that:
- Somebody gaining access to your Windows account will also have full access to the Linux installation
- Do not use an existing password for the WSL Linux account
Somebody could easily extract your password information… - Storing data in the Linux part of your computer does not add any extra security
- Always make sure that only you can access your Windows account
- Your LSCE Windows laptop (not your desktop) is encrypted with BitLocker, which adds some extra security
- Somebody gaining access to a backup of your Linux installation will easily have access to the Linux installation itself
- You can store your Linux installation backup to an external disk encrypted with BitLocker
Creating a backup
Backup of a FULL Linux installation
You can use wsl to save a full Linux installation to a tar file, that can be:
- used later for restoring the full installation
- used for relocating the full installation from
C:\to another disk
Detailed --export example:
- Determine the name of the current Linux installation(s) used in WSL
> wsl --list --verbose
  NAME             STATE           VERSION
* Ubuntu_custom    Running         2
-
> wsl --shutdown

> wsl -l -v
  NAME             STATE           VERSION
* Ubuntu_custom    Stopped         2
- … or stop just the specific installation that you want to save:
> wsl --terminate Ubuntu_custom
- Export the specified Linux installation to a tar file:
- You should export to a directory or external disk where you have enough space
e.g. The tar file for a newly installed and updated Ubuntu 20.04.5 LTS is ~1.4 Gb (550 Mb after compression) - You should use a detailed enough file name for the tar file
e.g. WSL_<Linux_Distribution>_<Distribution_Version>_<User>_<Date>.tar - Example:
wsl --export Ubuntu C:\Scratch\your_login\WSL\WSL_Ubuntu_20.04.5_LTS_stdu_22-10-27.tar
- You can (probably) save a lot of space by compressing the backup
- It is not documented (yet), but the wsl --import command (if you need to use it later) can directly import
tar.gzfiles! $ ls -lh /mnt/c/Scratch/your_login/WSL/WSL_Ubuntu_20.04.5_LTS_stdu_22-10-27.tar 3.3G Oct 27 18:01 /mnt/c/Scratch/your_login/WSL/WSL_Ubuntu_20.04.5_LTS_stdu_22-10-27.tar $ gzip /mnt/c/Scratch/your_login/WSL/WSL_Ubuntu_20.04.5_LTS_stdu_22-10-27.tar $ ls -lh /mnt/c/Scratch/your_login/WSL/WSL_Ubuntu_* 549M Aug 29 17:49 /mnt/c/Scratch/your_login/WSL/WSL_Ubuntu_20.04.5_LTS_stdu_22-08-29.tar.gz 548M Sep 14 16:18 /mnt/c/Scratch/your_login/WSL/WSL_Ubuntu_20.04.5_LTS_stdu_22-09-14.tar.gz 1.2G Sep 19 13:52 /mnt/c/Scratch/your_login/WSL/WSL_Ubuntu_20.04.5_LTS_stdu_22-09-19.tar.gz 1.3G Oct 27 18:01 /mnt/c/Scratch/your_login/WSL/WSL_Ubuntu_20.04.5_LTS_stdu_22-10-27.tar.gz
Backup of specific directories
You can also just create backups of specific directories:
- Your Linux home directory (
/home/your_login/), or some specific sub-directories of the Ubuntu running in WSL (sub-directories of/): the best way to save them is probably to create a tar file from Linux, and put this tar file in a specific Windows WSL backup folder (we will use below the directory/mnt/c/Scratch/your_login/WSLorc:\Scratch\your_login\WSL)$ cd /home $ du -sh $USER 88K your_login # We assume below that there is an existing /mnt/c/Scratch/your_login/WSL/ directory # Same directory (seen from WINDOWS) C:\Scratch\your_login\WSL\ $ tar cfz /mnt/c/Scratch/$USER/WSL/${USER}_home_`date +%y-%m-%d_%H%M`.tgz $USER # Check the size of the new (and existing old) backup(s) $ ls -ltrh /mnt/c/Scratch/your_login/WSL/${USER}_*.tgz 5.0K Oct 28 16:09 /mnt/c/Scratch/your_login/WSL/stdu_home_22-10-28_1609.tgz
- Regular Windows folders where you store data used by WSL: you can use
tarin a Linux terminal, as above, or use any usual way of backing up Windows files (drag and drop, some specific backup software)- WARNING: there should not be performance issues using
tar(from Linux) to make a backup of Windows files with WSL 1, but WSL 2 is significantly slower than WSL 1 to access Windows files (Exceptions for using WSL 1 rather than WSL 2)
Restoring or relocating a Linux installation
When we have the tar file of a FULL backup, we can use --import to install or restore it to a specific location.
Note:
- This is currently the only way of moving (relocating) a Linux installation to another disk than the default
C:\location - Importing will mostly put the
ext4.vhdxfile in the specified target location- You need enough disk space in the new disk location, knowing that the size of the restored
vhdxfile will start growing (as needed) as soon as you use your installation
- Creating a backup and restoring it is an indirect way of reclaiming the unused space of a Linux installation
vhdxfile: the size of theext4.vhdxfile after importing can be smaller than the size of the originally exportedext4.vhdxfile.
Detailed --import example:
- We assume that we have an exported installation
tarfile available- In this example, we use the compressed backup file created in Backup of a FULL Linux installation
C:\Scratch\<your_login>\WSL\WSL_Ubuntu_20.04.5_LTS_stdu_22-08-29.tar.gz
- Create the directory where the Linux installation (mostly its
ext4.vhdxfile) will be restored- Hint: choose an explicit directory path and name, using the name of the distribution that will be restored, because the name of the restored file itself will always be the same (
ext4.vhdx)
e.g.D:\WSL_Distributions\Ubuntu_custom
- Import the distribution, giving it a unique name (that does not appear already in
wsl -l -v)> wsl -l -v NAME STATE VERSION * Ubuntu Stopped 2 > wsl --import Ubuntu_custom D:\WSL_Distributions\Ubuntu_custom C:\Scratch\<your_login>\WSL\WSL_Ubuntu_20.04.5_LTS_stdu_22-08-29.tar.gz > wsl -l -v NAME STATE VERSION * Ubuntu Stopped 2 Ubuntu_custom Stopped 2
- After importing, there should be a new
ext4.vhdxfile in the previously emptyD:\WSL_Distributions\Ubuntu_customdirectory
- Start the imported
Ubuntu_customdistribution- Select
Ubuntu_customin the Windows Terminal pull-down menu - Or specify
Ubuntu_customin a PowerShell, using:
wsl --distribution Ubuntu_custom
orwsl -d Ubuntu_custom - WARNING: even if the imported distribution had an existing default user (
stduin our example), the new default user will beroot!- It is possible to explicitly specify the requested user each time we start a terminal, but it will be more convenient to specify a new default user
wsl --distribution Ubuntu_custom --user stdu - You can easily open a
rootsession with
wsl -d Ubuntu_custom -u root
- Select a new (non
root) default user (note: Add WSL a default user also shows how to create a new user). We just have to use therootaccount to add a default user (userstduin this example) to the /etc/wsl.conf file# cat /etc/wsl.conf cat: /etc/wsl.conf: No such file or directory # echo -e "[user]\ndefault=stdu" >> /etc/wsl.conf # cat /etc/wsl.conf [user] default=stdu
- Restart the Linux installation to take the new settings into account
wsl --terminate Ubuntu_custom
- If you need the
rootaccount later, you will need to use thesudocommand from the new default account (or usewsl -d Ubuntu_custom -u rootin a PowerShell)$ whoami stdu stdu@sadira034:~$ sudo su - [sudo] password for stdu: root@sadira034:~# whoami root
- If the relocation goal was to free up some space on
C:, it is possible to Remove the main installation, once the relocated installation has been successfully tested
Questions
- Is it possible to restore to the default location (on
C:\) ?
Uninstalling WSL or a distribution
Before uninstalling something, you probably want to create a backup, just to be safe…
Removing a specific Linux installation
This process is called unregistering (based on Unregister or uninstall a Linux distribution)
You just need to get the list of the currently installed Linux distributions, stop them and remove/unregister a specific distribution name
> wsl -l -v
  NAME             STATE           VERSION
* Ubuntu           Stopped         2
  Ubuntu_custom    Running         2

> wsl --terminate Ubuntu_custom

> wsl -l -v
  NAME             STATE           VERSION
* Ubuntu           Stopped         2
  Ubuntu_custom    Stopped         2

> wsl --unregister Ubuntu_custom
Désinscription...

> wsl -l -v
  NAME             STATE           VERSION
* Ubuntu           Stopped         2
Removing the main Linux installation
If you remove the main installation (on C:\):
- Another relocated installation will become the new default installation (if present)
PS C:\Users\your_login> wsl -l -v
  NAME             STATE           VERSION
  Ubuntu_custom    Running         2
* Ubuntu           Running         2

PS C:\Users\your_login> wsl --unregister Ubuntu
Désinscription...

PS C:\Users\your_login> wsl -l -v
  NAME             STATE           VERSION
* Ubuntu_custom    Running         2
- The initial installation directory will still be present on
C:\, and should probably be left untouched:C:\Users\your_login\AppData\Local\Packages\CanonicalGroupLimited.UbuntuonWindows_79rhkp1fndgsc\- …with a very low disk usage (the big
ext4.vhdxis removed during theunregisterstep)
Ubuntuwill still appear in the Microsoft store, and clicking onLaunchwill trigger a re-installation onC:\- If you end up with an installation error message and a new orphan
ext4.vhdxfile onC, click onLaunchto restart and complete the installation
Ubuntuwill still appear in the list of installed applications (Windows+I⇒Applications) but with a smaller disk usage, probably just the size of the Linux kernel installed and updated independently of the Linux installations)
Removing WSL
wsl is a part of the Windows system and probably can't be removed.
Anyway, when all existing Linux distributions are uninstalled, there should not be any big .vhdx files remaining (i.e. no extra disk space used), and there will not be any Linux processes running (i.e. no extra CPU used).
Miscellaneous
Upgrading WSL 1 to WSL 2
You will be able to run existing WSL 1 installations with WSL 2, so upgrading should not be a problem!
Determining which version of WSL is installed
If you have never used WSL on a computer, WSL 2 will be installed directly when you follow the Base installation steps
You can determine if your installed Linux distributions are running on WSL 1 or WSL 2 by typing wsl -l -v in a PowerShell, but if you are not sure if you are currently using WSL 1 or WSL 2 for running Linux, you can check if Is there an easy (PowerShell?) way to get more information about WSL? has been answered, or make the following checks
wsl –updatewill give the same output (i.e. the installed Linux kernel version) for both WSL 1 and WSL 2PS C:\Users\jypeter> wsl --update Recherche de mises à jour en cours... Veuillez patienter Aucune mise à jour n’est disponible. Version du noyau : 5.10.102.1
wsl –statuswill display again the kernel version if you already have WSL 2, but will display a link to the WSL installation page if you are running WSL 1: https://aka.ms/wsl2-installPS C:\Users\jypeter> wsl --status Distribution par défaut : Ubuntu Version par défaut : 2 Activez la fonctionnalité Windows de plateforme de machine virtuelle et assurez-vous que la virtualisation est activée dans le BIOS. Pour plus d’informations, rendez-vous sur https://aka.ms/wsl2-install
Prerequisites
- If WSL 1 is already running, you should have no problem with the disk and memory requirements
- For WSL 2, you also need to meet the Hyper-V requirements
Upgrading WSL
Activate the Virtual Machine Platform (just the Step 3 instructions) and reboot the computer
After rebooting, go back to the Determining which version of WSL is installed section above, and check that you are now using WSL 2
Potentially useful stuff
- Determining from inside the running Linux if you are using WSL (or another type of virtual machine)
$ systemd-detect-virt
wsl

$ env | grep -i wsl
WSL_DISTRO_NAME=Ubuntu
WSLENV=
Other WSL resources and links
- Possibly useful things to sort
-
- Very useful Microsoft blogs about Windows Console, Command-Line, Windows Subsystem for Linux, WSL, Linux
- Awesome-WSL: An Awesome collection of Windows Subsystem for Linux information, distributions, and tools
- Hands-On with WSL: Installation & New Features (five nice and useful articles)
[ PMIP3 Wiki Home ] - [ Help! ] - [ Wiki syntax ]